4GL Unit Testing
- 4GL Unit Testing
ABLUnit and OEUnit are common unit test frameworks for Progress 4GL applications.
ABLUnit and OEUnit are both supported in FWD. Instead of converting the 4GL code for those respective projects, the support has been implemented from scratch in Java, based on JUnit5 architecture.
4GL code related to ABLUnit or OEUnit is marked with annotations (see below). During conversion of the 4GL code, FWD converts these annotations to
corresponding Java annotations known to the FWD Test Engine.
At runtime, the FWD Test Engine uses these annotations to discover Java classes, containing tests related to the engine. The discovered tests are executed, and the results are used in reports, from the console/command line or in IDEs like Eclipse.
The FWD Test Engine supports both unit testing flavors, so you can mix both styles in the same sources with some restrictions noted below, which is impossible in OE.
Primer
This chapter contains a simple example on how to create and run 4gl unit tests from command-line in FWD.
This instruction is primarily intended for application testers and administrators. Developer topics (source convertion and application building) are not covered here.
After completion of this example, you will be able to:
- write simple legacy classes and procedures containing 4gl unit tests.
- configure the FWD application for running tests
- run tests from Unix command line.
- understand the test report
- use various methods of selecting tests to run
We need some FWD application project to create tests in. In this primer it is assumed we use a FWD project named myApp.
Write test sources
At this step, we will create a simple legacy class and procedure, containing unit tests.
Create a directory examples in the ABL catalog of your project.
In the examples directory, create a legacy class file ABLUnitPrimer.cls:
USING OpenEdge.Core.Assert.

ROUTINE-LEVEL ON ERROR UNDO, THROW.

CLASS examples.ABLUnitPrimer:

  /**
   * This test is expected to succeed.
   */
  @Test.
  METHOD PUBLIC VOID Success():
    Assert:Equals("qwerty", "qwerty").
  END METHOD.

  /**
   * This test will fail.
   */
  @Test.
  METHOD PUBLIC VOID Fail():
    Assert:Equals("qwerty", "asdf").
  END METHOD.

  /**
   * This test will throw an expected exception, so will succeed.
   */
  @Test(expected = "OpenEdge.Core.AssertionFailedError").
  METHOD PUBLIC VOID ExpectedToFail():
    Assert:Equals("qwerty", "asdf").
  END METHOD.

END CLASS.
The class has 3 methods marked with the @Test annotation. This annotation is used to tell the test engine this method is a unit test method.
So, this class has 3 unit test methods:
- The
Successmethod. This method is expected to run without errors. - The
Failmethod. This method will fail with anOpenEdge.Core.AssertionFailedErrorlegacy exception. - The
ExpectedToFailmethod. This method is the same as theFailmethod, but is marked with theexpected = "OpenEdge.Core.AssertionFailedError"annotation value. So it is expected to throw anOpenEdge.Core.AssertionFailedErrorlegacy exception, and will fail if it does not throw this exception or throws anything else.
Note: the ROUTINE-LEVEL ON ERROR UNDO, THROW. statement is required to assure proper error propagation from the test methods.
Note: The OpenEdge.Core.Assert legacy class is part of ABLUnit assertion library which is fully implemented in FWD. This library is not related to the FWD test engine, but is very useful for writing real world tests.
In the examples directory, create a 4gl procedure file ABLUnitPrimer.p:
USING OpenEdge.Core.Assert.

ROUTINE-LEVEL ON ERROR UNDO, THROW.

/**
 * This test is expected to succeed.
 */
@Test.
PROCEDURE Success:
  Assert:Equals("qwerty", "qwerty").
END PROCEDURE.

/**
 * This test will fail.
 */
@Test.
PROCEDURE Fail:
  Assert:Equals("qwerty", "asdf").
END PROCEDURE.

/**
 * This test will throw an expected exception, so will succeed.
 */
@Test(expected = "OpenEdge.Core.AssertionFailedError").
PROCEDURE ExpectedToFail:
  Assert:Equals("qwerty", "asdf").
END PROCEDURE.
This file contains the same 3 tests, but this time tests are implemented as 4gl internal procedures.
Convert and build the application
See the FWD documentation on how to do this. We will not discuss this here.
Remember the Java package of the converted Java classes (in this primer we will assume com.myApp.examples). We will need this knowledge later when selecting tests for running.
Configure FWD client
There is one defference in how a FWD client should be configured for unit tests.
For "ordinary" FWD client, we can provide all configuration parameters in command line arguments, so using client configuration file is not necessary.
FWD unit testing is based on JUnit5, and this method of configuration is not available, so we must use a configuration file and define all required FWD client configuration parameters in this file, and in this simple primer the file name should be unit_test.xml.
In all other aspects, the configuration file for unit testing is not different from any other FWD client configuration file.
As usual, the file should be placed in the client working directory (deploy/client). The file contents may look like this:
<?xml version="1.0"?>

<node type="client">
   <net>
      <queue conversation="true"/>
      <queue start_thread="false"/>

      <server host="localhost"/>
      <connection secure="false"/>
      <server secure_port="4434"/>
      <server insecure_port="4534"/>
   </net>
   <client>
      <driver type="gui_swing"/>
      <driver theme="com.goldencode.p2j.ui.client.gui.theme.Windows10Theme"/>
   </client>
</node>
Make sure the secure_port and insecure_port values match the corresponding FWD server ports numbers.
Prepare a script to run tests
Now we are ready to run tests. We will use the tool named Console Launcher which runs tests from command line in a text terminal.
Since the command line may be quite long, we will use a Unix shell script.
You can use any script file name and location. In this primer we will assume that the script file name is run-tests, and it is located in the application root directory.
The script contents may look as follows:
#!/bin/bash

# FWD project location
p2j=~/p2j/branches/fwd

# FWD classpath JARs location
p2jlibs=$p2j/build/lib

# Application project root
app_project=~/Projects/myApp

java \
  -ea \
  -Djava.library.path=$p2j/build/native \
  -classpath $app_project/build/classes:\
$p2j/build/classes:\
$p2jlibs/*.jar:\
$p2jlibs/fwdaopltw.jar:\
<list other FWD classpath JARs here>  \
  \
  org.junit.platform.console.ConsoleLauncher \
  --exclude-engine=junit-vintage \
  --exclude-engine=junit-platform-suite \
  $@
Here:
- the
$p2jvariable points to the FWD built project. - the
$p2jlibsvariable points to the catalog with JARs FWD client runtime depends on. - the
$app_projectis themyAppproject root directory.
Note: the Java "main" class to run is org.junit.platform.console.ConsoleLauncher instead of usual com.goldencode.p2j.ui.client.chui.driver.console.ConsoleDriver.
Note: The --exclude-engine=junit-vintage option tells JUnit5 to ignore the old JUnit4 compatibility test engine, since we have no "ordinary" Java JUnit4 tests to run.
The --exclude-engine=junit-platform-suite option tells JUnit5 to ignore the JUnit5 test suite engine.
We want to run the FWD test engine only, and using this --exclude-engine option allows us to suppress activation of these "standard" JUnit5 engines even if they exist in the classpath. If we didn't exclude these two test engines, the test output would contain some extra lines that we don't need.
The user is assumed to run this script with parameters, which allow to select tests to run (see below).
Run tests
Assure the myApp FWD server is running.
Now we are ready to run tests, and we have to select which tests to run. JUnit5 and FWD test engine provide several ways to select tests (described below in more detail). For now, since all converted Java code reside in a single Java package com.myApp.examples, we will select tests by Java package using the --select-package option of the console launcher:
  cd $app_project/deploy/client
  ./run-tests --select-package com.myApp.examples
The result will look like this:
vvt@gcddev:~/Projects/myApp$ ./run-tests --select-package com.myApp.examples

Thanks for using JUnit! Support its development at https://junit.org/sponsoring

╷
└─ FWD Test ✔
   ├─ examples.ABLUnitPrimer ✔
   │  ├─ success ✔
   │  ├─ expectedToFail ✔
   │  └─ fail ✘ Expected: qwerty but was: asdf
   └─ examples/ABLUnitPrimer.p ✔
      ├─ success ✔
      ├─ expectedToFail ✔
      └─ fail ✘ Expected: qwerty but was: asdf

Failures (2):
  FWD Test:examples.ABLUnitPrimer:fail
    MethodSource [className = 'com.myApp.examples.AblunitPrimer', methodName = 'fail', methodParameterTypes = '']
    => org.opentest4j.AssertionFailedError: Expected: qwerty but was: asdf
       com.myApp.examples.AblunitPrimer.fail(AblunitPrimer.java:59)
  FWD Test:examples/ABLUnitPrimer.p:fail
    MethodSource [className = 'com.myApp.examples.AblunitPrimer_1', methodName = 'fail', methodParameterTypes = '']
    => org.opentest4j.AssertionFailedError: Expected: qwerty but was: asdf
       com.myApp.examples.AblunitPrimer_1.fail(AblunitPrimer_1.java:50)

Test run finished after 144 ms
[         3 containers found      ]
[         0 containers skipped    ]
[         3 containers started    ]
[         0 containers aborted    ]
[         3 containers successful ]
[         0 containers failed     ]
[         6 tests found           ]
[         0 tests skipped         ]
[         6 tests started         ]
[         0 tests aborted         ]
[         4 tests successful      ]
[         2 tests failed          ]
What do we see here is:
- There was no any error encountered during the run. Good.
- JUnit5 has discovered the
FWD Testengine. - Both Java classes resulted from conversion of our 4gl sources were discovered by FWD test engine.
- These classes are referenced by their 4gl-ish names (as
examples.ABLUnitPrimerandexamples/ABLUnitPrimer.p) instead of Java names (com.myApp.examples.AblunitPrimerandcom.myApp.examples.AblunitPrimer_1). - 3 unit test methods were executed in each class.
- Stack traces are provided for the failed tests. Note that stack traces use the Java class and method names.
More on the console launcher options
In the previous section, we selected unit tests by Java package. This is not the only available method.
You can use the following console launcher command line options to select tests:
--scan-classpath. Scans all directories on the classpath or selected classpath directory.Note: classpath items of other types like JARs are silently ignored by this option.
Application developers can use this option to discover and run all unit tests in a converted application, provided that the application
build/classesis in the classpath instead ofmyApp.jar.Example:
./run-tests --scan-classpath `pwd`/build/classes/--select-package. Scans all classes in a Java package.Example:
./run-tests --select-package com.myApp.examples--select-class. Selects one Java class.Example:
./run-tests --select-class com.myApp.AblunitPrimer--select-method. Selects one class method.Example:
./run-tests --select-method=com.myApp.examples.AblunitPrimer#fail--scan-modules,--select-module. While these options are formally supported by the FWD testing engine, they are currently useless because Java modules are not used in the converted FWD code.
All these options can be repeated.
For the full list of console launcher options, run the our script with --help option:
./run-tests --help
The result listing will look like this:
Thanks for using JUnit! Support its development at https://junit.org/sponsoring

Usage: ConsoleLauncher [OPTIONS]
Launches the JUnit Platform for test discovery and execution.
      [@<filename>...]       One or more argument files containing options.

COMMANDS

  -h, --help                 Display help information.
      --list-engines         List all observable test engines.

SELECTORS

      --scan-classpath, --scan-class-path[=PATH]
                             Scan all directories on the classpath or explicit
                               classpath roots. Without arguments, only
                               directories on the system classpath as well as
                               additional classpath entries supplied via -cp
                               (directories and JAR files) are scanned.
                               Explicit classpath roots that are not on the
                               classpath will be silently ignored. This option
                               can be repeated.
      --scan-modules         EXPERIMENTAL: Scan all resolved modules for test
                               discovery.
  -u, --select-uri=URI       Select a URI for test discovery. This option can
                               be repeated.
  -f, --select-file=FILE     Select a file for test discovery. This option can
                               be repeated.
  -d, --select-directory=DIR Select a directory for test discovery. This option
                               can be repeated.
  -o, --select-module=NAME   EXPERIMENTAL: Select single module for test
                               discovery. This option can be repeated.
  -p, --select-package=PKG   Select a package for test discovery. This option
                               can be repeated.
  -c, --select-class=CLASS   Select a class for test discovery. This option can
                               be repeated.
  -m, --select-method=NAME   Select a method for test discovery. This option
                               can be repeated.
  -r, --select-resource=RESOURCE
                             Select a classpath resource for test discovery.
                               This option can be repeated.
  -i, --select-iteration=TYPE:VALUE[INDEX(..INDEX)?(,INDEX(..INDEX)?)*]
                             Select iterations for test discovery (e.g. method:
                               com.acme.Foo#m()[1..2]). This option can be
                               repeated.

FILTERS

  -n, --include-classname=PATTERN
                             Provide a regular expression to include only
                               classes whose fully qualified names match. To
                               avoid loading classes unnecessarily, the default
                               pattern only includes class names that begin
                               with "Test" or end with "Test" or "Tests". When
                               this option is repeated, all patterns will be
                               combined using OR semantics. Default: ^(Test.*|.+
                               [.$]Test.*|.*Tests?)$
  -N, --exclude-classname=PATTERN
                             Provide a regular expression to exclude those
                               classes whose fully qualified names match. When
                               this option is repeated, all patterns will be
                               combined using OR semantics.
      --include-package=PKG  Provide a package to be included in the test run.
                               This option can be repeated.
      --exclude-package=PKG  Provide a package to be excluded from the test
                               run. This option can be repeated.
  -t, --include-tag=TAG      Provide a tag or tag expression to include only
                               tests whose tags match. When this option is
                               repeated, all patterns will be combined using OR
                               semantics.
  -T, --exclude-tag=TAG      Provide a tag or tag expression to exclude those
                               tests whose tags match. When this option is
                               repeated, all patterns will be combined using OR
                               semantics.
  -e, --include-engine=ID    Provide the ID of an engine to be included in the
                               test run. This option can be repeated.
  -E, --exclude-engine=ID    Provide the ID of an engine to be excluded from
                               the test run. This option can be repeated.

RUNTIME CONFIGURATION

      -cp, --classpath, --class-path=PATH
                             Provide additional classpath entries -- for
                               example, for adding engines and their
                               dependencies. This option can be repeated.
      --config=KEY=VALUE     Set a configuration parameter for test discovery
                               and execution. This option can be repeated.

REPORTING

      --fail-if-no-tests     Fail and return exit status code 2 if no tests are
                               found.
      --reports-dir=DIR      Enable report output into a specified local
                               directory (will be created if it does not exist).

CONSOLE OUTPUT

      --disable-ansi-colors  Disable ANSI colors in output (not supported by
                               all terminals).
      --color-palette=FILE   Specify a path to a properties file to customize
                               ANSI style of output (not supported by all
                               terminals).
      --single-color         Style test output using only text attributes, no
                               color (not supported by all terminals).
      --disable-banner       Disable print out of the welcome message.
      --details=MODE         Select an output details mode for when tests are
                               executed. Use one of: none, summary, flat, tree,
                               verbose. If 'none' is selected, then only the
                               summary and test failures are shown. Default:
                               tree.
      --details-theme=THEME  Select an output details tree theme for when tests
                               are executed. Use one of: ascii, unicode.
                               Default is detected based on default character
                               encoding.

For more information, please refer to the JUnit User Guide at
https://junit.org/junit5/docs/current/user-guide/
Writing Tests
In ABLUnit/_OEUnit_ tests can be located in OE procedures (as internal procedures) or OE class methods. To mark an internal procedure or a class method for using with unit testing, the annotations listed in the following section should be used.
Annotations
The following table describes legacy annotations used by ABLUnit and OEUnit and the corresponding names of the Java annotation classes these annotations are converted to. All Java annotation classes are located in the package com.goldencode.p2j.testengine.api.
| Name | Attributes | Description | Java name |
|---|---|---|---|
@After |
- | ABLUnit: execute this method/procedure after all test methods in the class/procedure. OEUnit: execute this method/procedure after each test method in the class. | @AfterAll (ABLUnit) or @AfterEach (OEUnit) |
@AfterClass |
- | execute this method/procedure after all test methods in the class/procedure. | @AfterAll |
@Before |
- | ABLUnit: execute this method/procedure before all test methods in the class/procedure. OEUnit: execute this method/procedure before each test method in the class. | @BeforeAll (ABLUnit) or @BeforeEach |
@BeforeClass |
- | execute this method/procedure before all test methods in the class/procedure. | @BeforeAll |
@DataProvider |
name |
OEUnit: use this method to obtain data to run other test method or methods in this class. By default the method name is used as the data provider name, this can be overridden with the name annotation attribute. |
@DataProvider |
@Fixture |
name |
OEUnit: use this method to prepare DB before running other test method or methods in this class. By default the method name is used as the data provider name, this can be overridden with the name annotation attribute. |
@Fixture |
@Ignore |
- | mark methods which will not be used as unit tests. | @Disabled |
@Setup |
- | Execute this method before each test methods in the class/procedure. | @BeforeEach |
@TearDown |
- | execute this method after each test method in the class. | @AfterEach |
@Test |
expected, dataProvider, fixture |
Mark test methods. Use the expected annotation attribute to mark methods which are expected to fail. The value of the expected annotation attribute is the expected legacy error class. Use the dataProvider annotation attribute to refer the name of other method in this class, which will be used to obtain the data provider object. Use the fixture annotation attribute to refer the name of other method in this class, which will be used to obtain the fixture object. |
@Test |
@TestSuite |
classes, procedures |
Run test suite: add classes and/or procedures listed in this annotations to the discovery candidates. Use the classes annotation attribute to list the fully qualified names of legacy classes. Use the procedures annotation attribute to list the paths to procedures containing unit tests. All lists are comma-separated. |
@Suite, SelectClasses, @SelectProcedures |
@Tag |
value |
Tag legacy class, procedure or method with a JUnit5 compatible tags. Use the value annotation attribute to for a tag value. This annotation is repeatable, so you can assign multiple tags to one item. In runtime tags are used by JUnit5 to select tests. See the JUnit5 Tags documentation for more detail. In runtime configuration (console, Eclipse JUnit Run/Rebug launcher configuration etc.) the user usually can define the tags to include and exclude. |
@Tag, @Tags |
Note: values in legacy annotations must be double-quoted. This is a current limitation of the FWD conversion process.
Note: the same legacy annotations @Before and @After have the different (opposite kind of) meanings in ABLUnit and OEUnit. Be careful when configuring the source flavors.
Note: Unlike Java, in 4gl there is no such thing as default value tag attribute, so this attribute must be used explicitly: @Tag(value="SomeTag")., but not @Tag("SomeTag")..
Error Propagation
Assert that errors are propagated from the tests properly: add the following directive to the beginning of the source file:
ROUTINE-LEVEL ON ERROR UNDO, THROW.
Examples
Simple Test
The following example contains a class with a simple empty test method which always succeed.
ROUTINE-LEVEL ON ERROR UNDO, THROW.

CLASS examples.ClassMethodTest1:

  @Test.
  METHOD PUBLIC VOID Test():
    // This test does nothing, so it must always succeed!
  END METHOD.

END CLASS.
The same trivial test designed as an OE procedure:
ROUTINE-LEVEL ON ERROR UNDO, THROW.

@Test.
PROCEDURE Test:
  // This test does nothing, so it must always succeed!
END PROCEDURE.
ABLUnit Assertion Library
The following example contains a class with two methods using assertion library. The first method should succeed, the other should fail. The assertion library is described in more detail below.
USING OpenEdge.Core.Assert.

ROUTINE-LEVEL ON ERROR UNDO, THROW.

CLASS examples.ClassMethodTest2:

  @Test.
  METHOD PUBLIC VOID SuccessTest():
    Assert:Equals("qwerty", "qwerty").
  END METHOD.

  @Test.
  METHOD PUBLIC VOID FailTest():
    Assert:Equals("qwerty", "asdf").
  END METHOD.

END CLASS.
Similar test designed as a procedure:
USING OpenEdge.Core.Assert.

ROUTINE-LEVEL ON ERROR UNDO, THROW.

@Test.
PROCEDURE SuccessTest:
  Assert:Equals("qwerty", "qwerty").
END PROCEDURE.

@Test.
PROCEDURE FailTest:
  Assert:Equals("qwerty", "asdf").
END PROCEDURE.
OEUnit Assertion Library
The folowing example contains a class with two methods using OEUnit assertion library. The first method should succeed, the other shoulld fail. The assertion library is described in more detail below.
USING OEUnit.Assertion.Assert.

ROUTINE-LEVEL ON ERROR UNDO, THROW.

CLASS examples.OEUnitAssert:

  @Test.
  METHOD PUBLIC VOID SuccessTest():
    Assert:AreEqual("qwerty", "qwerty").
  END METHOD.

  @Test.
  METHOD PUBLIC VOID FailTest():
    Assert:AreEqual("qwerty", "asdf").
  END METHOD.

END CLASS.
Marking A Test Which Is Expected To Fail
This example demonstrates a method which is expected to fail throwing an error. The expected annotation attribute is used to define the expected exception legacy class, in this case the OpenEdge.Core.AssertionFailedError, used by the assertion library.
USING OpenEdge.Core.Assert.

ROUTINE-LEVEL ON ERROR UNDO, THROW.

CLASS examples.ClassMethodTest3:

  @Test(expected = "OpenEdge.Core.AssertionFailedError").
  METHOD PUBLIC VOID ExpectedExceptionTest():
    Assert:Equals("qwerty", "asdf").
  END METHOD.

END CLASS.
ABLUnit Setup/TearDown
This example demonstrates a class with methods which execute before and after every test method in the class.
USING OpenEdge.Core.Assert.

ROUTINE-LEVEL ON ERROR UNDO, THROW.

CLASS examples.ClassMethodTest4:

  @Setup.
  METHOD PUBLIC VOID Setup():
    MESSAGE "Before each test".
  END METHOD.

  @TearDown.
  METHOD PUBLIC VOID TearDown():
    MESSAGE "After each test".
  END METHOD.

  @Test.
  METHOD PUBLIC VOID Test1():
    MESSAGE "Test1".
  END METHOD.

  @Test.
  METHOD PUBLIC VOID Test2():
    MESSAGE "Test2".
  END METHOD.

END CLASS.
Note: In OEUnit the same test would use the Before and After annotations instead of Setup and TearDown.
This test should emit these messages in the following order:
Before each test.Test1.After each test.Before each test.Test2.After each test.
Before/After
This example demonstrates a class with methods which execute once before all test method in the class, and once after all test methods in the class.
USING OpenEdge.Core.Assert.

ROUTINE-LEVEL ON ERROR UNDO, THROW.

CLASS examples.ClassMethodTest5:

  @Before.
  METHOD PUBLIC VOID Before():
    MESSAGE "Before all tests".
  END METHOD.

  @After.
  METHOD PUBLIC VOID After():
    MESSAGE "After all tests".
  END METHOD.

  @Test.
  METHOD PUBLIC VOID Test1():
    MESSAGE "Test1".
  END METHOD.

  @Test.
  METHOD PUBLIC VOID Test2():
    MESSAGE "Test2".
  END METHOD.

END CLASS.
Note: In OEUnit the same test would use the BeforeClass and AfterClass annotations instead of Before and After. Assure the source is configured as ABLUnit flavor.
This test should emit these messages in the following order:
Before all tests.Test1.Test2.After all tests.
ABLUnit TestSuite
This example demonstrates the ABLUnit test suite. It contains a class annotated with the @TestSuite annotation. The annotation attributes list the classes and/or procedures in the suite.
ROUTINE-LEVEL ON ERROR UNDO, THROW.

@TestSuite(classes="examples.ClassMethodTest1,
                    examples.ClassMethodTest2",
           procedures="examples/Procedure1.p,
                    examples/Procedure2.p").
CLASS examples.suite.TestSuite:

  @Test.
  METHOD PUBLIC VOID TestMethod():
    MESSAGE "Test Methods Are Also Allowed!".
  END METHOD.

END CLASS.
Note: As you may see in the example, the test suite class can have also "ordinary" unit test methods, which are also recognized by the FWD Test Engine.
OEUnit TestSuite
This example demonstrates the OEUnit test suite. Unlike ABLUnit suite, in OEUnit suite tests are created in the test class constructor by creating test class instances in discovery time. These instances are also used later to run tests.
ROUTINE-LEVEL ON ERROR UNDO, THROW.

CLASS examples.oeunitsuite.TestSuite
INHERITS OEUnit.Runner.TestSuite:

  CONSTRUCTOR TestSuite():
    AddTest(NEW examples.ClassMethodTest1()).
    AddTest(NEW examples.ClassMethodTest2()).
  END CONSTRUCTOR.

END CLASS.
ABLUnit Disabled Test
This example demonstrates how test methods can be disabled with the @Ignore annotation.
USING OpenEdge.Core.Assert.

ROUTINE-LEVEL ON ERROR UNDO, THROW.

CLASS examples.Ignored:

  @Test.
  @Ignore.
  METHOD PUBLIC VOID DisabledTest():
    // This test will not be executed, so the failure will NOT be reported.
    Assert:IsTrue(FALSE).
  END METHOD.

END CLASS.
Methods marked with @Ignore are completely ignored in runtime, regardless of other method annotations.
Using Tags
This is an additional feature which is not available in the original 4GL versions of either ABLUnit or OEUnit.
These examples demonstrates how tests can be filtered using the @Tag annotation.
Tagged legacy class and method example:
block-level on error undo, throw.

@Tag(value="SomeClassTag").
class examples.ClassTagged:

  @Tag(value="SomeTag").
  @Tag(value="SomeOtherTag").
  @Test.
  method public void TaggedTest():
    // no-op
  end method.

  method public void UntaggedTest():
    // no-op
  end method.

end class.
Tagged procedure example:
@Tag(value="SomeClassTag").

block-level on error undo, throw.

@Test.
@Tag(value="SomeTag").
procedure TaggedTest:
  // no-op
end.

@Test.
procedure UntaggedTest:
  // no-op
end.
If we run including exactly one tag SomeTag, only the methods/or classes tagged with this tag will be executed. In our case these are the TaggedTest method in the ClassTagged class and the TaggedTest procedure in the procedure-tagged.p procedure. No classes or procedures not tagged with the SomeTag tag, will be executed.
If we run including exactly one tag SomeClassTag, despite the ClassTagged class and the procedure-tagged.p procedure are tagged with this tag, no methods are tagged, so none will be executed.
If we run including tags SomeClassTag and SomeOtherTag, only the TaggedTest method in the ClassTagged class will be executed: the tags select both the method and the method class.
If we run excluding the tag SomeOtherTag, everything but the TaggedTest method in the ClassTagged class will be executed.
OEUnit DataProvider Test
This example demonstrates how to use OEUnit DataProvider feature. In this example, data provider is created from JSON code. The data provider has 3 records, so 3 tests are created by the engine in the discovery process.
using OEUnit.Assertion.Assert.
USING OEUnit.Data.DataProvider.

routine-level on error undo, throw.

class examples.DataProviderJSON:

  @Test (dataProvider = "myDataProviderJSON").
  METHOD PUBLIC VOID testDataProviderJSON(INPUT value1 AS CHARACTER, INPUT value2 AS CHARACTER):
     Assert:AreEqual(value1, value2).
  END METHOD.

  @DataProvider.
  METHOD PUBLIC DataProvider myDataProviderJSON():
     DEFINE VARIABLE dataProvider AS DataProvider NO-UNDO.
     dataProvider = NEW DataProvider().
     dataProvider:FromJSON(
       "~{ ~"data~": "
       + "[~{ ~"value1~": ~"asdf~", ~"value2~": ~"asdf~"}, "
       +  "~{ ~"value1~": ~"bvcx~", ~"value2~": ~"bvcx~"}, "
       +  "~{ ~"value1~": ~"qwerty~", ~"value2~": ~"qwerty~"}]}").
     RETURN dataProvider.
   END METHOD.

end class.
The test results for this example in Eclipse looks like this, the tests created for each data provider record are named by adding the record number suffix after / (slash) delimiter:

For other dataprovider test examples see the original OEUnit documentation distributed with the OEUnit package.
OEUnit Fixture Test
This example demonstrates how to use OEUnit Fixture feature. In this example, a fixture is created from JSON code. The fixture has 2 records, which is adds to the Customer table when applied. To run this test, you should have a compatible Customer table with two fields: customerName and customerNum.
&Scoped-define CUSTOMER1-NAME John Smith
&Scoped-define CUSTOMER1-NUM 10
&Scoped-define CUSTOMER2-NAME Freddie Mercury
&Scoped-define CUSTOMER2-NUM 11

USING OEUnit.Assertion.Assert.
USING OEUnit.Data.Fixture.

ROUTINE-LEVEL ON ERROR UNDO, THROW.

CLASS examples.FixtureJSON:

  @Test(fixture = "FixtureFromJSON").
  METHOD PUBLIC VOID testRunFixtureJSON():
    DEFINE VARIABLE recordCount AS INTEGER NO-UNDO.
    FOR EACH test3820.Customer:
      Assert:IsTrue(("{&CUSTOMER1-NAME}" = customerName AND {&CUSTOMER1-NUM} = customerNum)
                 OR ("{&CUSTOMER2-NAME}" = customerName AND {&CUSTOMER2-NUM} = customerNum)).
      recordCount = recordCount + 1.
    END.
    Assert:AreEqual(recordCount, 2).
  END METHOD.

  @Fixture(name = "FixtureFromJSON").
  METHOD PUBLIC Fixture myFixture_JSON():
    DEFINE VARIABLE fixture AS Fixture NO-UNDO.
    fixture = NEW Fixture().
    Assert:IsTrue(fixture:FromJSON("~{ ~"Customer~": ["
                     + "  ~{ ~"customerName~": ~"{&CUSTOMER1-NAME}~", ~"customerNum~": {&CUSTOMER1-NUM}},"
                     + "  ~{ ~"customerName~": ~"{&CUSTOMER2-NAME}~", ~"customerNum~": {&CUSTOMER2-NUM}}"
                     + "]}")).
    Assert:AreEqual(fixture:TableCount, 2).
    Assert:AreEqual(fixture:Size, 1).
    RETURN fixture.
  END METHOD.

END CLASS.
For other fixture test examples see the original OEUnit documentation distributed with the OEUnit package.
Configure Source Conversion
Note: The configuration described here is required if you use OEUnit annotations in the sources. If you use ABLUnit only, no additional configuration is necessary (by default all unit testing is detected and converted as ABLUnit).
The goal of the configuration is to tell the conversion program whether particular legacy sources must be converted as ABLUnit or OEUnit. This is required since the meaning of the @Before and @After annotations depends on the framework being used:
| Framework | Before Each Test | After Each Test | Before All Tests | After All Tests |
|---|---|---|---|---|
| ABLUnit | @Setup |
@TearDown |
@Before |
@After |
| OEUnit | @Before |
@After |
@BeforeClass |
@AfterClass |
You can configure sources at the:
- project level in
cfg/p2j.cfg.xml - source directory level using
directory.hints - source file level using
<sourcename>.hints
Note: Regardless of which way you choose, the literal value ABLUnit will be used for ABLUnit and the literal value OEUnit will be used for OEUnit.
Note: The configuration methods described here are just standard FWD configuration methods, nothing special.
Note: The order in which configuration is looked for is: source, directory, project, the more specific is the method, the higher is the priority.
Project Level
At the project level you can define which engine will be the default. In project cfg/p2j.cfg.xml add the following cfg/global/parameter to make the ABLUnit framework default.
<parameter name="legacy-unit-test" value="ABLUnit" />
or, to make the OEUnit framework default
<parameter name="legacy-unit-test" value="OEUnit" />
Note: If you do not add such parameter, ABLUnit will be used as the default unit test flavor.
Source Directory Level
The usual FWD hints mechanism is used to configure the unit test type for all sources located in a directory. In a source directory you want to configure, create a file directory.hints. Use the type attribute of the legacy-unit-test XML element to set the desired type.
Example for OEUnit:
   <?xml version="1.0"?>
   <hints>
     <legacy-unit-test type="OEUnit"/>
   </hints>
Source Level
This way is similar to defining unit test type at the directory level, but this time, instead of directory.hints as the file name, use the name of the source file, appending the .hints suffix to it. For example, for the SomeClass.cls legacy class source, the hints file name will be SomeClass.cls.hints.
Configure OE Version Compatibility
Different versions of OpenEdge provide with different implementations of ABLUnit. As the result, ABLUnit tests developed for one particular version of OE ABLUnit may not work correctly with another version of OE.
To be able to work with ABLUnit test sources created for different versions of OE, the FWD test engine provides version compatibility layer. For this to work correctly, the correct version of OE must be configured for FWD server. The node is server/default/runtime/default/version, and the version should be set as a string. For example, for the OE version 11.7.12, the directory node will look like this:
  <node class="container" name="">
    ...
    <node class="container" name="server">
      ...
      <node class="container" name="default">
        ...
        <node class="container" name="runtime">
          ...
          <node class="container" name="default">
            ...
            <node class="string" name="version">
              <node-attribute name="value" value="11.7.12"/>
            </node>
If this node is missed, the default value 11.6 is used.
At the moment of writing this compatibility layer was tested with OE versions 11.6 and 11.7.12, and the differences relate to tests implemented as 4gl procedures.
Running Tests
As for any other FWD application, running ABLUnit tests requires both server and client parts running.
Running the Server
You will need to enable access for an additional remote protocol between the FWD Test Engine client and server. In directory.xml add the following block at security/acl/net:
  <node class="container" name="001301">
    <node class="strings" name="subjects">
      <node-attribute name="values" value="all_others"/>
    </node>
    <node class="netRights" name="rights">
      <node-attribute name="permissions" value="'0101'B"/>
    </node>
    <node class="resource" name="resource-instance">
      <node-attribute name="reference" value="com.goldencode.p2j.testengine.UnitTestEngine"/>
      <node-attribute name="reftype" value="TRUE"/>
    </node>
  </node>
Otherwise the server part is no different from any other FWD server. Write a FWD application which includes classes and/or procedures marked with ABLUnit annotations.
Run the server in the way you like (from Eclipse or command line). No specific configuration is required. Run in debug mode if you want to debug server code. You can use the same server instance both for unit testing and for running ordinary FWD clients.
Running the Client
The client part is a bit special:
- The application you run as a FWD client is 3rd party test runner software based on JUnit5 library.
- It knows nothing about FWD.
- It discovers JUnit5 test engines searching the classpath for particular service points.
- The features it provides differ from one implementation to another implementation.
The main differences from a "usual" FWD client:
- The control flow differs significantly.
- The Java "main" driver class
com.goldencode.p2j.main.ClientDriverused to run "ordinary" FWD clients along with the ability to configure the client from command-line, is not available anymore. - In addition to the usual FWD client configuration, you need to provide also JUnit5 configuration (at least say the runner where to look for the tests).
Regardless of which kind of runner software is being used, make sure:
- You client classpath should usually include all classes you normally use on the server only. The reason is that FWD engine on client uses Java reflection to discover tests, so it may need to load more Java classes, than is usually required for "ordinary" FWD client. Also, the classpath should include JUnit5 jars. The simplest way to achieve all this, is just to add all FWD library classes to your classpath.
- The application is started in the FWD client home directory (
<project>/deploy/client). - All necessary FWD client parameters are passed. Note that FWD test engine sets the batch mode as the default. JUnit5 runners know nothing about FWD, so they have no way to pass FWD client parameters through the command-line arguments. The only way to do so is using client configuration file. In most cases the name of the file must be
unit_test.xml, it must be put into the client home catalog<project>/deploy/client. The file contents example for running tests in non-batch GUI Swing mode:
      <?xml version="1.0"?>
      <node type="client">
         <net>
            <queue conversation="true"/>
            <queue start_thread="false"/>

            <server host="localhost"/>
            <connection secure="false"/>
            <server secure_port="4434"/>
            <server insecure_port="4534"/>
         </net>
         <client>
            <driver type="gui_swing"/>
            <mode batch = "false"/>
            <driver theme="com.goldencode.p2j.ui.client.gui.theme.Windows10Theme"/>
         </client>
      </node>
Using Console Launcher
To run JUnit5 tests from command-line, you may use the JUnit5 Console Launcher:
- Use the
org.junit.platform.console.ConsoleLauncheras the main driver class instead of usualcom.goldencode.p2j.ui.client.chui.driver.console.ConsoleDriver. - Provide any JVM arguments you need, for example:
- Provide necessary FWD client JVM arguments, for example:
-Djava.library.path=/home/user/p2j/branches/fwd/build/native -Duser.country=NL -Duser.language=nl -Djava.util.logging.config.file=logging.properties - Provide the console launcher arguments to configure the discovery, for example:
--exclude-engine=junit-vintage --scan-classpath
Note: Console Launcher allows you to pass some data to the FWD Test Engine in the form of configuration parameters. At the moment, the only parameter recognized by FWD Test Engine is fwd_config_file, which is the name of the FWD client configuration file (unit_test.xml by default). For example, to make FWD client read configuration from a different file my_unit_test.xml, add the following option to Console Launcher command line:
--config=fwd_config_file=my_unit_test.xml
Note that many other test runners, including Eclipse or Gradle runner, do not provide similar features, so the default file name will always be used with them.
Using Eclipse
- For the selected project, create a run/debug configuration(s) for FWD client. Use
JUnitas the configuration type. - On the
Testtab selectRun all tests in the selected project, package or source folder:.Note: unfortunately, I have not managed to make the other option
Run a single testworking to select tests on a class or method level. - In the
Argumenttab:- set the working directory as
${workspace_loc:<project>/deploy/client}
where<project>is the name of your Eclipse project. - set the
VM arguments:, for example-Djava.library.path=/home/user/p2j/branches/fwd/build/native
- set the working directory as
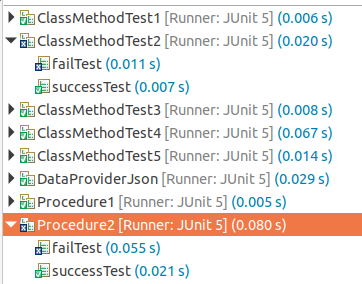
After the tests are complete, the JUnit view in Eclipse looks like this:
More on Passing Client Bootstrap Configuration
When you run a FWD client, you need to pass bootstrap configuration parameters (server connection information, client driver type etc.).
When you run an "ordinary" FWD client, you can use the application command line for this, since the "main" Java ClientDriver class can read the command line.
Unfortunately, when you run JUnit5 tests, a different Java "main" method is called: that from the test runner used. Test runners are provided by third parties (examples are Eclipse test runner, console test runner), and they use command line arguments internally as they wish, there is neither any common rules, nor any way to control this.
As the result, the application command line cannot be used to pass any data to unit test engines.
As the command line is not available, the only way to pass parameters for the FWD client run internally by FWD test engine is using FWD client configuration files.
By default FWD test engine reads bootstrap configuration parameters from a file named unit_test.xml, which is located in the client working directory (e.g. deploy/client).
JUnit5 provides a way test runners can pass data to test engines: JUnit5 configuration parameters.
Using configuration parameters you can pass an alternate path to the client configuration file in the parameter named fwd_config_file. This path must be either an absolute path, or a path relative to the FWD client working directory.
The problem with this method is that the only test runner known supporting this feature is console test runner.
Libraries
ABLUnit Assertion Library
Along with a Test Engine, FWD fully implements ABLUnit assertion library:
OpenEdge.Core.AbstractAssertionFailedErrorOpenEdge.Core.AssertOpenEdge.Core.AssertionFailedErrorOpenEdge.Core.Assertion.AssertArrayOpenEdge.Core.Assertion.AssertErrorOpenEdge.Core.Assertion.AssertFileOpenEdge.Core.Assertion.AssertJsonOpenEdge.Core.Assertion.AssertObject
OEUnit Assertion library
FWD fully implements the OEUnit assertion library:
OEUnit.Assertion.AssertionFailedErrorOEUnit.Assertion.AssertOEUnit.Assertion.AssertString
Control Flow
The FWD Test Engine is based on JUnit5 framework. By JUnit5, the users usually mean the Jupiter Test Engine, designed for testing programs written in plain Java.
The JUnit5 framework was specially designed for writing extensions and test engines. The Jupiter engine is just mostly known example.
The FWD Test Engine is another example of JUnit5 Test Engine in its own, it has no any relation to the Jupiter engine.
The FWD Test Engine is implemented as a set of classes in the com.goldencode.p2j.testengine package. The "main" class is com.goldencode.p2j.testengine.FWDTestEngine. Also, a number of Java annotations classes are located in the com.goldencode.p2j.testengine.api package. These annotations are created by FWD conversion process for ABLUnit and OEUnit legacy annotations.
The main difference from Jupiter engine (and the main reason why the Jupiter engine cannot be used directly for FWD unit testing) is that the FWD Test Engine has client and server parts.
Both parts are connected by an additional remote protocol defined in the com.goldencode.p2j.testengine.UnitTestEngine interface and implemented statically in the com.goldencode.p2j.testengine.UnitTestServer class.
The JUnit5 program consist of the following three parts:
- The front-end, or "runner". This is a third-party software, which is responsible for discovery request creation and displaying/reporting the test results. Examples: JUnit5 console runner, Eclipse IDE support for JUnit5. This software deals with the JUnit5 APIs, and knows nothing about the test engines used. This software is the one active part, it makes calls to JUnit5.
- The JUnit5 framework. It receives the calls from the "runner" and makes calls to all test engines it can find.
- Test engines. Test engines receive calls from the JUnit5 framework. Know nothing about the "runners". There can be any number of test engines.
The control flow is the JUnit5 control flow, nothing specific to FWD. It includes two phases:
- discovery phase: information on test methods is collected.
- execute phase: collected test methods and related code are executed.
Discovery
- The "runner" forms a discovery request, which defines where and how to look for the tests. This requests contains lists of so-called discovery selectors of different types.
The following discovery selector types are supported by the FWD Test Engine:
- Class root: a directory with classes in the classpath. All classes in the tree are searched for tests.
- Java package. All classes in the package are searched for tests.
- Java class. The class is searched for tests.
- Java method. The method is tested if it is a test method.
- Java module. This is supported by FWD Test Engine, but probably makes no sence, since FWD does not use Java modules yet.
All other JUnit5 discovery item types currently have no meaning in the FWD Test Engine. In the future we can decide to invent other custom discovery types, using these types.
- The discovery request is passed by JUnit5 framework to the all test engines as a series of calls to the
discovermethod of each engine. - On the first discovery request the FWD engine reads request configuration parameters, initialises the FWD client and attempts to connect to the server.
If this fails, the engine switches to inoperable state, and this and all subsequent discovery requests return empty results.
- If engine initialization succeeded, all discovery requests are processed in usual way, the result is a hierarchy of test descriptors. Test descriptors are objects conforming to the
org.junit.platform.engine.TestDescriptorinterface. Test descriptors are identified in the scope of entire test plan by their unique IDs.In the FWD Test Engine the following descriptor types do exist:
FWDEngineDescriptoris the root of the descriptor hierarchy. It defines theprepareImplandcleanUpImplto wrap entire execution phase.FWDClassTestDescriptoris the descriptor type for a legacy classes containing tests. It also holds data to support test method execution life cycle.FWDProcedureTestDescriptoris the descriptor type for a legacy procedures containing tests.FWDClassMethodTestDescriptoris the descriptor type for a legacy class test method.FWDProcedureMethodTestDescriptoris the descriptor type for a legacy procedure test method.NoopDescriptorthis descriptor does nothing and is returned from thediscovermethod for an inoperable engine.
For simple tests the hierarchy looks like this:
- The top
FWDEngineDescriptorhas a number of class test descriptors children (ofFWDClassTestDescriptororFWDProcedureTestDescriptortype). - Each class test descriptor has a number of method test descriptors children (of
FWDClassMethodTestDescriptororFWDProcedureMethodTestDescriptortype).
Execution
The execution phase is initiated by the JUnit5 framework after all tests requested by the user are collected.
At the execution phase the JUnit5 framework makes a single call to the engine execute, passing (among other things we are not interested in) the root test descriptor.
Test Descriptor Actions
All FWD test discriptors implement the following actions:
prepare- prepare the execution context for this descriptor.before- do actions before the test execution, if any.execute- do the test, if applicable.after- do actions after the test execution, if anycleanUp- free the execution context
Action Call Order
Test descriptor actions are called hierarchically in the following order, starting from the root (engine) descriptor:
preparebeforeexecute- recursively execute this call sequence for all the childs descriptors, if any
aftercleanup
Note that this control flow is executed on the client, while all real stuff happens on the client. Every call of methods listed above is translated to the implementation method, which name has the Impl suppex. For example, the prepare descriptor method on the client is translated to the prepareImpl method at the server side.
Action Implementations
Test descriptors of different kinds do the following:
prepareImpl# Engine descriptor: prepare FWD runtime for execution (seeFWDEngineDescriptor.prepareImpl). # Legacy class descriptor: create the test legacy class object instance to use with all methods for this class, unless it was created at discovery phase by OEUnit test suite. # Legacy procedure descriptor: create the test legacy procedure instance to use with all methods for this class.beforeImpl# Legacy class or procedure descriptor: call all before all methods, if any. # Legacy method descriptor: call all before each methods, if any.executeImpl# Legacy method descriptor: call all test methods.The execution flow depends on:
- whether the expected exception was configured for this test method.
- whether the OEUnit fixture was configured for this test method.
See
AbstractMethodTestDescriptor.executeImplfor detail.afterImpl# Legacy class or procedure descriptor: call all after all methods, if any. # Legacy method descriptor: call all after each methods. See below for more detail.cleanupImpl# Engine descriptor: close the execute cycle (seeFWDEngineDescriptor.cleanupImpl) # Legacy class or procedure descriptor: free the test class instance or procedure instance
Troubleshoot
Unknown or ambiguous table customer. (725)
This was discussedin in #9385. The issue arises when using Developer Studio and creating a 4GLUnit project. The catch is that the project configured databases are not inherited by the configurations. One should manually configure the DB ocnnections on the
Limitations
Common for ABLUnit and OEUnit
Currently FWD implements the equivalent of a COMPILE statement during the running of conversion. This is a non-interactive batch job. At runtime, there is currently no support for the COMPILE statement.
This means that features which require on-the-fly compilation of 4GL code, are not supported by the FWD test engine.
Missing OEUnit features
- The existing 4GL user interface for running OEUnit is not supported, instead one should run OEUnit using the JUnit console launcher or via the IDE.
- (yet) unimplemented methods
OEUnit.Runner.TestSuite.gettest(INPUT integer)OEUnit.Util.List.get(INPUT integer)OEUnit.Util.List.remove(INPUT integer)
- unimplemented method
OEUnit.Util.Instance.fromfile(INPUT character). Implementation requires on on-the-fly compilation of 4GL code. - (yet?) unimplemented method
OEUnit.Util.Instance.fromtype(INPUT character).
Running tests from Eclipse
Running unit tests from Eclipse is limited by the Eclipse test runner program (part of Eclipse itself):
- Eclipse runner ignores the application part of Java command-line, defined in the Eclipse launch configuration. As the result, client bootstrap configuration can only be defined in the file with the fixed name
unit_test.xml, located in the directory, in which the tests are executed. This will be probably workarounded by passing data as Java properties. - In Eclipse test engines cannot be disabled explicitly, so the JUnit5 runtime always tries to start the FWD test engine, if an application has
p2j.jarin the classpath explicitly or implicitly (this happens when thefwdspi.jaris installed into the JRE "external" catalog). This makes it impossible to run "ordinary" JUnit5 tests in environments other than complete FWD client/server. In such situations the FWD test engine fails to start, after which no other test engines are tried by JUnit5 framework.
Note that these issues are specific for Eclipse and can be avoided when tests are executed from command-line.
Related FWD Tasks
- #3827: for ABLUnit support.
- #4658: "OO serialization support"
- #6237: for OEUnit support.
- #6963: "Incorrect conversion of legacy class constructors with an unknown argument of object type". Such calls can occur in unit tests for ABLUnit assertion library.
- #6974: "NPE at OpenEdge.Core.Class.IsInterface". Prevents ABLUnit assertion library implementation completion.
- #6993: "OO: incorrect field names in DataTypeEnum.java"
- #7193: "READ-JSON is not supported for the "LONGCHAR" source type"
- #7247: "Dataset:READ-XML does nothing"
- #8302 Fix unittest suite
- #8138 ABLUnit configuration using environment variables
- #8921 REGRESSION FWD test engine crashes with UnsatisfiedLinkError when encounters problem in initialization
- #9134 Tool for unit testing results managing
- #9338 Import JUnit test report back into Harness
- #9387 Branch-based integration of tests to xfer/testcases
- #9450 Missing OEUnit features
- #9486 leverage the execution time data in unit test results to profile performance
© 2022-2025 Golden Code Development Corporation. ALL RIGHTS RESERVED.