Filtering Reports for a Subset of Files
Introduction
By default, all analytics processing is done on all files in the project. For example, when a report is opened, it will have been created with the results from all ASTs in the project. There are times when it is very useful to focus analysis on a subset of the ASTs. FWD provides this capability through a custom file list, also called a profile. By defining and activating different profiles one can look at the analytics results without the noise of the larger project. In large projects this noise can be overwhelming.
These profiles can be managed and activated from the File List Filters screen. On first entry to the screen, it looks like this:

On the left side is the list of existing profiles. When first installed, only one profile exists: Include All. This is the built-in default which specifies all AST files in the project. When the user logs in to the system, Include All is the active profile. Any other profiles have to be created and activated explicitly by the user.
On the right side is a tree view that displays the ASTs specified by the currently selected profile. During editing, this is the mechanism by which ASTs are added or removed.
Activating a custom profile means that subsequent use of the other reporting features (except for call graph processing) will only process on the files and folders included in the profile. All other content will be excluded.
Managing a Custom File List
File lists are also called profiles. Profiles can be managed using the Create Profile, Edit Profile and Delete Profile buttons.
Create Profile
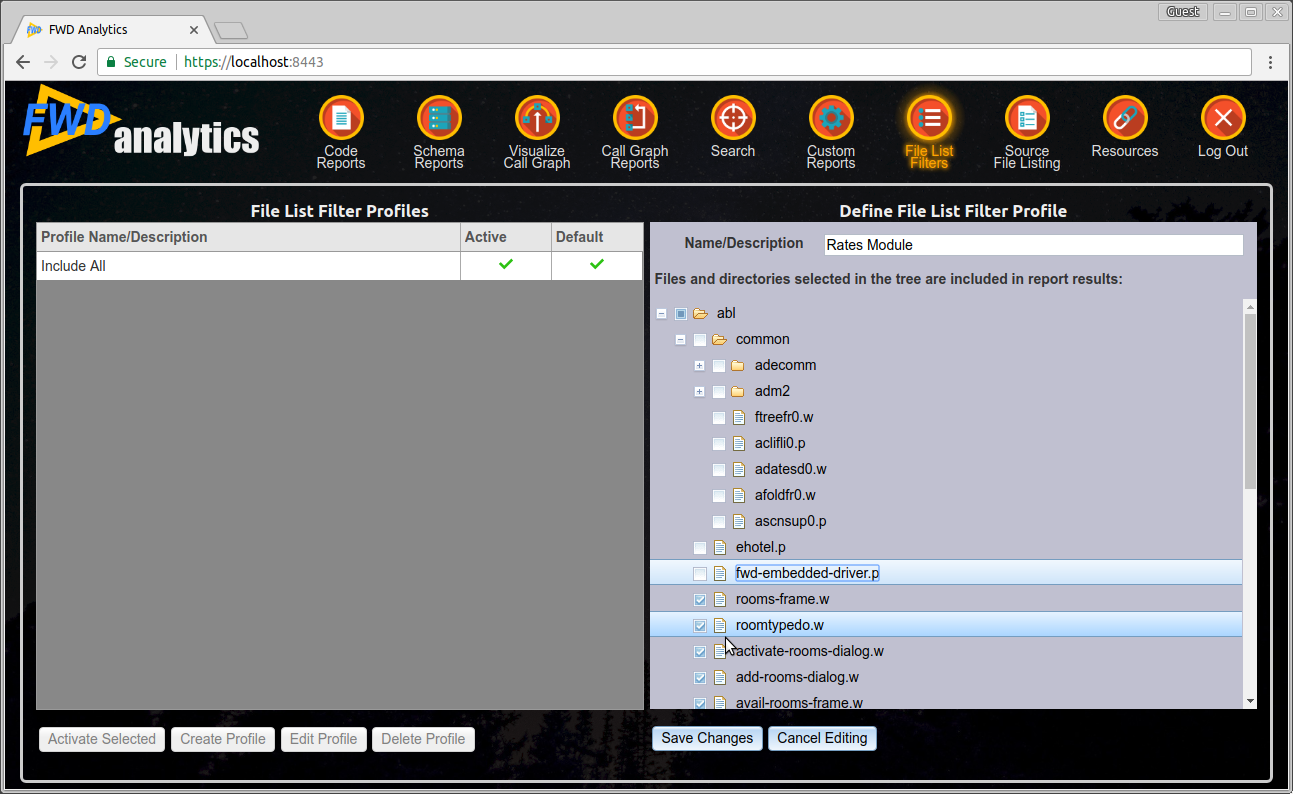
To create a new profile, click on the Create Profile button. The right side of the screen will shift into editing mode:

Type a unique name for the profile and use the tree control to explore the list of ASTs. By default, each new profile has all ASTs already included. Use the check-box on the left side of any file or folder to control its inclusion in the profile. Uncheck any files or entire folders that should be removed from the profile. If you make a mistake, re-add the ASTs to the profile by checking the box associated with the entry.
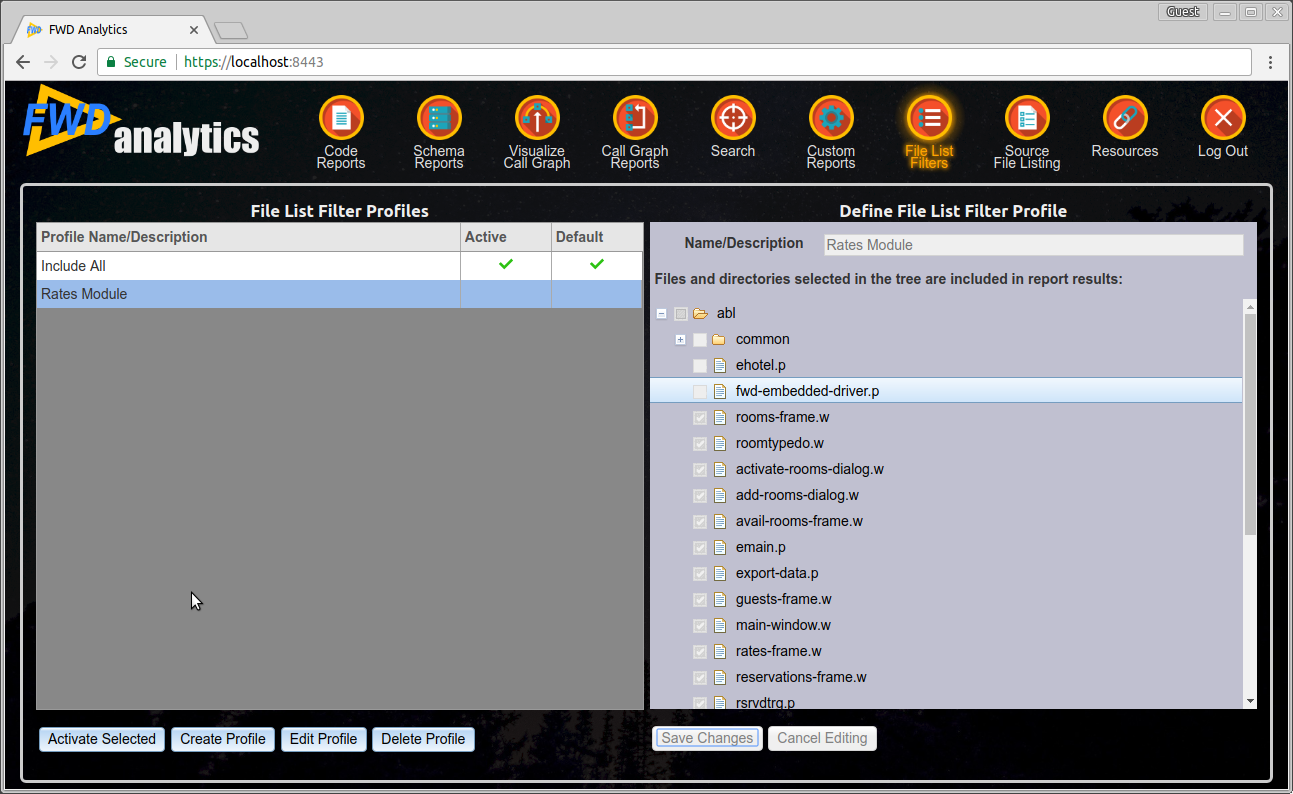
When the profile is defined as needed, use the Save Changes button to save the profile. The saved profile will appear on the left side. It does not get activated without further intervention. Cancel Editing can be used to drop all changes and exit editing mode.
Here is what it will look like after Save Changes:
Edit Profile
The built-in Include All profile cannot be edited. Any other existing profile can be edited by selecting the profile name on the left side and clicking on the Edit Profile button.
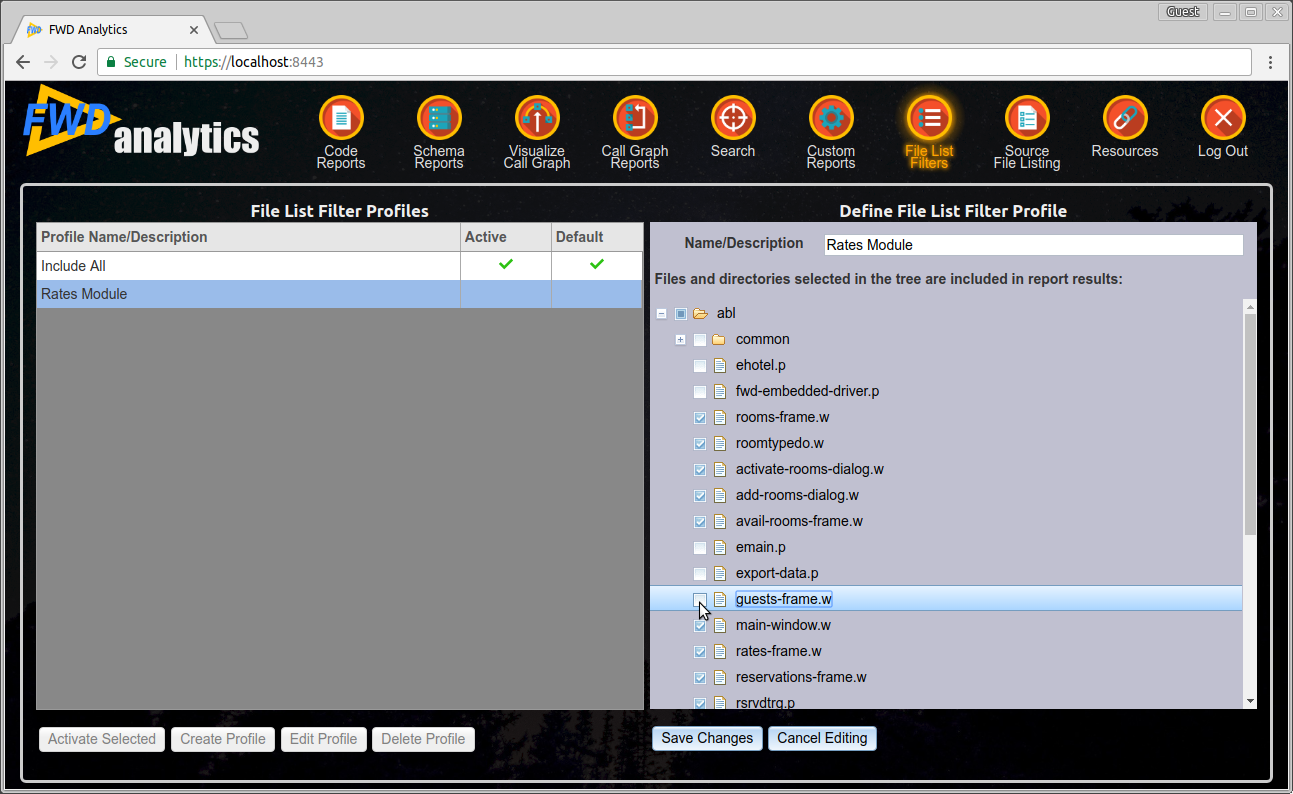
This re-enables the right side for editing, allowing the profile name to be changed and for files/folders to be added or removed.
Use the Save Changes button to save the profile or Cancel Editing to drop any edits and exit editing mode.
Delete Profile
The built-in Include All profile cannot be deleted. Any other existing profile can be deleted by selecting the profile name on the left side and clicking on the Delete Profile button.
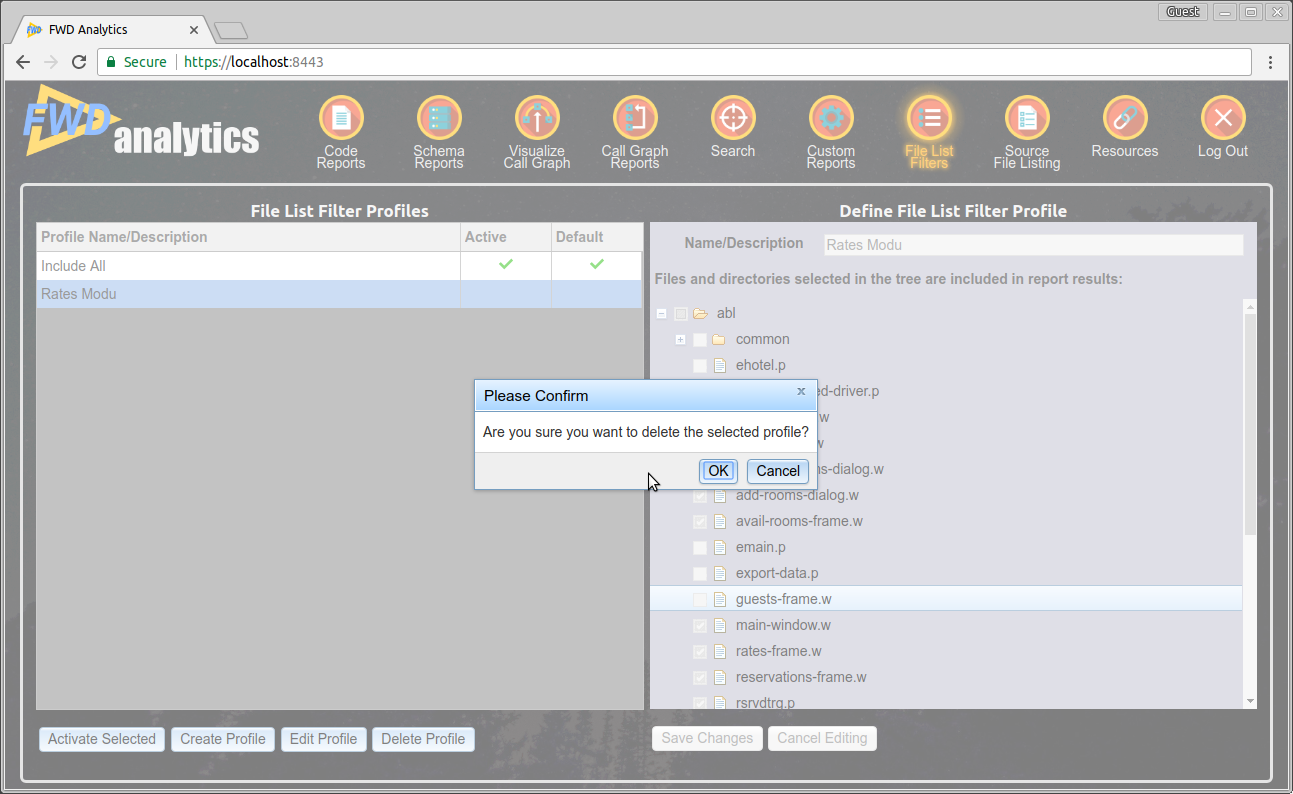
Press OK to delete the profile or Cancel to cancel the delete. Make sure you really want to delete the profile. There is no way to recover a deleted profile after you press OK.
Activating a Custom File List
By default, the Include All profile is active when the analytics is first loaded. Activating a custom profile means that subsequent use of the other reporting features (except for call graph processing) will only process on the files and folders included in the profile. All other content will be excluded.
To activate a custom profile, select the profile to be activated and then click the Activate Profile button. Here is how it will look when a Rates Module is selected and activated:
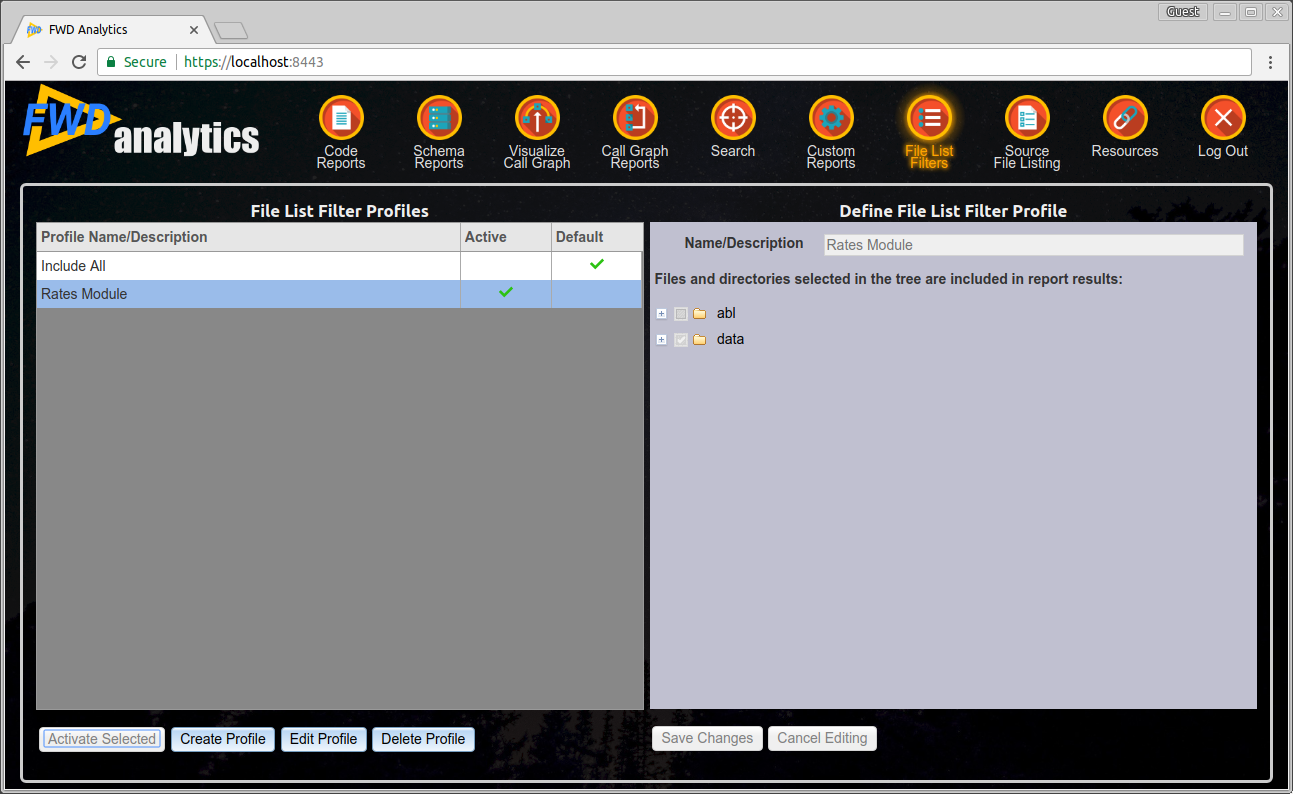
Notice that the Rates Module is now marked Active. Subsequent use of the Code Reports, Schema Reports, Search and other screens will only operate on the files and folders included in that profile.
How a Filter Profile Affects Code Analytics
Changing the active Filter Profile affects the way the Code Analytics application works in several ways:- it changes the content and statistics reported by the standard code and schema code reports;
- it affects the default set of ASTs analyzed by the ad-hoc search feature.
External Procedure Files (abl folder) versus Schema Export Files (data folder)
If your project layout follows the suggested model of the sample projects, you have two top-level directories containing 4GL artifacts: the abl directory contains all ABL source code (e.g., *.p, *.w, *.i, etc. files); the data directory contains all exported schemata for permanent databases, in the form of *.df files. You will notice that this structure is reflected by the right side of the File List Filters view.
The data check box tree displays only schema export files for permanent databases (i.e., not temp/work-tables). By selecting or deselecting the check box associated with any particular schema export file, you can control the content of the schema reports which present information about permanent databases. If a schema export file is selected here, its resources (e.g., tables, fields, indices, etc.) are included in schema reports, when that filter profile is active; otherwise, those resources are excluded from those reports. Thus, changing the active filter may change schema report statistics about the number of report condition matches found and the number of files in which those matches occurred, as well as changing the content of summary reports. Some summary reports may become completely empty as a result. Please note that including/excluding schema export files does not affect the content of code reports; it only impacts the schema reports.
The abl check box tree displays only external procedure files (organized hierarchically by the directories which contain them), even if the abl directory contains other files (e.g., include files). Each node in the check box tree represents a fully preprocessed version of an external procedure file. So, technically, these nodes represent *.cache files in FWD terminology, though for the sake of familiarity to ABL developers, the node labels specify only the original external procedure name, omitting the .cache extension.
If an external procedure file's corresponding check box is selected, it means that any report conditions that were matched in that file are included in the code and schema reports, when the current filter profile is the active filter profile. Likewise, if an external procedure file is deselected, its matches are excluded from the code and schema reports, when that filter profile is active. Thus, changing the active filter may change code and schema report statistics about the number of report condition matches found and the number of files in which those matches occurred, as well as changing the content of summary reports. Some summary reports may become completely empty as a result.
It may not be immediately obvious why the inclusion or exclusion of particular external procedure files in a filter profile can affect schema reports instead of only code reports. The reason is that temp/work-tables are defined in ABL source code, so excluding a preprocessed external procedure naturally excludes any temp/work-tables it defines. Thus, any schema reports which analyze temp/work-tables and their resources will be affected accordingly.
Search
By excluding certain external procedure files and certain schema export files in a filter profile, you will limit the default set of corresponding code and schema ASTs that are searched by default with the Search feature. For more details, please refer to the Search chapter.
© 2004-2017 Golden Code Development Corporation. ALL RIGHTS RESERVED.