Hotel GUI Demo Application for FWD v3.0.0
- Hotel GUI Demo Application for FWD v3.0.0
- Introduction
- Downloads
- Screen Shots and Video
- Known Issues
- Get Started
- Setup, Convert and Run the Hotel Application Using FWD
- Download and Unpack the Project Code
- Ensure FWD is Installed and Built
- Create the FWD Directory Symlink in the Hotel Project Directory
- Prepare the Hotel Project's Configuration
- Convert and Build Using FWD
- Run Reports
- Fonts Setup
- Install the Root CA in Your Browser
- Install the Spawner
- Start the FWD Server and Connect to the Application
- Running the Hotel Application on an OpenEdge System
- Use the Hotel Project as a Template for a Different Application
- Configure your Project Using the prepare_template Script
- Setup of Additional Databases
- Prepare Your Application Sources, Schema and Database Export
- Run Reports
- Run Conversion
- Build Your Application
- Import the Database
- Setup the Font Table
- Setup the Color Table
- Run the FWD Server and Connect to Your Application
- FWD Project Configuration Details
- ABL Features in Use
Introduction
The Hotel GUI demo application is an ADM2 application written for the purpose of demonstrating the features (particularly the graphical user interface features) of FWD. It manages some basic aspects of a hotel (check-ins, reservations, room availability and rates, etc.). The ABL source code for the application was written primarily with the AppBuilder, using a Progress database back end. Although it is a relatively compact application, it demonstrates a fairly wide variety of ABL features, for example: ADM2, various GUI widgets (including browse, a calendar control, a tree control, etc.), database triggers, publish/subscribe, plus many others (see the list of ABL features in use below).
Like all applications converted by FWD, the business logic of the hotel application executes in the FWD application server. There are three client modes available for the end user to interact with the business logic:- Swing GUI Client - this is most closely analogous to the original, OpenEdge client. The user interface is presented via a desktop client, running as an independent program. Navigation of the application works as before.
- Virtual Desktop Web Client - this mode presents the user interface inside a web browser, but looks very similar to the original desktop client. Application screens have their title bars and window decorations, and the application generally looks and behaves just like the original, only within the client area of a web browser. Navigation of the application works as before.
- Embedded Web Client - this mode also presents the user interface inside a web browser, but embedded within a larger web application. Application screens present without their title bars and window decorations. Navigation of the application is controlled by the enclosing web application, and the enclosing web application communicates with the embedded, converted application through remote procedure calls between JavaScript and converted ABL code, or via publish/subscribe notifications.
In addition, the Hotel GUI project serves as a template project for your own ADM/ADM2 ABL application. You can replace the source code and other resources specific to the demo application with your own, for the purposes of running reports for code analytics against your own ABL, or to convert and deploy your ABL application using the FWD runtime environment and a new backing database.
Downloads
| Download | Revision | Date | Description |
|---|---|---|---|
| ABL Source Code and FWD Project | 125 | 2017-04-04 | This is the original ABL source code and schema for the application. It also includes all the configuration files and build scripts needed to convert and run the application using FWD. |
| Converted Java Source Code | 125 | 2017-04-04 | This is the converted Java application code generated by FWD. |
| Reports | 125 | 2017-04-04 | Standard reports generated using the FWD reporting engine. These reports provide a deep look inside the ABL code of the original application. |
Screen Shots and Video
See Screen Shots and Video for the latest release of the Hotel ChUI project.
Known Issues
There are a number of open, known issues with the Hotel GUI application. Since the demo application is primarily illustrative, these may or may not be fixed in future versions of this example project.
- Embedded web client mode:
- In Firefox, the web application sometimes starts with no background image and login doesn't work. It seems that the web application is not fully initialized in this case. To work around this issue, simply reload the web application URL in the browser. If the background image appears, login should work.
- When a modal dialog from the embedded, converted, legacy application is displayed, all surrounding controls are disabled with an overlay which blocks user input. This is by design, to enforce modality of the current dialog; however, under certain circumstances, this overlay is not dismissed when it should be. Example recreate: Available -> Check-In... -> Update -> Help (in error alert box) -> OK -> OK -> Cancel. This appears to be a defect in FWD itself, rather than in the sample application; as such, it will be fixed.
- In Firefox, a swipe on an existing date range path within the heat map calendar control tries to drag the calendar as an image, instead of starting a new date range selection. Recreate: swipe a date range with the mouse in the calendar heat map. Then start another swipe on a date which is part of the currently selected date range. Firefox will treat this as direct manipulation (i.e., drag and drop) of an image, instead of beginning a new date range swipe.
- Calendar heat map control draws some dates incorrectly (e.g., August 31, 2017).
Get Started
Following are details about how to configure and run the Hotel GUI project on FWD and on OpenEdge, as well as details on how to use this project as a starting point to convert and run your GUI application.
This document does not address how to install/build/setup FWD on your system. Please refer to the official FWD Documentation for those details. A good place to start if you haven't used FWD before is Development Environment Setup.
You will find steps on what input you need (as OpenEdge sources), how to configure the project for conversion, import the database, and finally build and execute your application using the FWD server.
The conversion process is automated using bash or Windows command scripts and also using ANT, with various tasks provided in the existing build.xml file. The ANT version used is 1.9.6 or later.
Setup, Convert and Run the Hotel Application Using FWD
To run the Hotel application using FWD, there are some steps required to prepare the conversion configuration and runtime for your operating system. The next sections detail how to use the existing scripts to configure the project and also provide a description of the configuration changes made by these scripts.
Download and Unpack the Project Code
These instructions assume that there is a directory structure as follows:
| Purpose | Linux | Windows |
|---|---|---|
| Top level project directory. | ~/projects/ |
c:\projects\ |
| FWD project location | ~/projects/p2j/ |
c:\projects\p2j\ |
| Hotel conversion project location | ~/projects/hotel/ |
c:\projects\hotel\ |
In the table of the Downloads section, download the .zip file labeled "ABL Source Code and FWD Project".
Unpack the project (assumes the downloaded file is named ~\projects\hotel_project.zip on Linux and c:\projects\hotel_project.zip on Windows):
| Linux | Windows |
|---|---|
cd ~/projects unzip hotel_project.zip -d hotel/ |
First install JDK to use jar tool as zip extractor.cd c:\projects mkdir hotel cd hotel jar xf ..\hotel_project.zip |
Ensure FWD is Installed and Built
Make sure that you have a system on which FWD can be built. The most common way to do this is to follow the instructions in Development Environment Setup. At the end of those instructions, the system will have a fully built FWD installation that can be used for conversions, reporting and for the execution of the Hotel project. Complete those instructions before continuing here.
Create the FWD Directory Symlink in the Hotel Project Directory
The Hotel GUI application is dependent upon the FWD technology to convert and run. Since the Hotel GUI and the FWD projects are installed on the system in separate locations, we create a symbolic/soft link to the FWD project directory from within the Hotel GUI project directory. This allows the Hotel GUI project to find the FWD resources it needs.
The standard conversion project configuration can use a local FWD installation directly. This would be done inside the top level of the conversion project.
| Linux | Windows |
|---|---|
The most common approach is to use a symlink from the conversion project directory to the FWD directory. The following instructions assume that the FWD sources have been built in ~/projects/p2j/ and the conversion project being setup is in ~/projects/hotel/ (we are using the Hotel sample application as the example here).cd ~/projects/hotel/ ln -s ../p2j/ p2j |
Since Windows Vista, symlinks (soft links) are available using the mklink utility. The command is(it is required to run command line as Administrator to complete this task):cd c:\projects\hotel\ mklink /D p2j ..\p2j If you encounter You do not have sufficient privilege to perform this operation. you may need to run mklink with elevated privileges (Right-click the Command Prompt shortcut and Run As Administrator). Make sure there aren't any explicit Deny permissions set for the Administrators group on the target directory.In Windows XP this does not work so it requires copying the full c:\projects\p2j directory instead of making a link. Alternatively, the FWD install can be placed directly on the conversion project directory. |
The result is a p2j/ directory in the top level conversion project directory. This is sufficient to support all other conversion processing which is usually automated via an Apache Ant build script.
The "p2j" is a historical name for "Progress 4GL to Java". References to that name are still present in the code. Those references will be removed and/or replaced with references to "fwd", but that work is not yet complete.
Prepare the Hotel Project's Configuration
In order to convert and run the Hotel GUI sample application, some configuration is necessary.
The project contains a script which will automatically prepare that configuration for you. Alternatively, you can manually configure the project.
To prepare the project using the script, execute prepare_hotel.cmd on a Windows OS or prepare_hotel.sh on a Linux OS. This script will read predefined settings for the Hotel GUI project or compute values which are dependent on your installation, updating configuration files as necessary to convert and run the Hotel application.For the web client, it is required to have some manual edits done, specific to your OS installation - follow the Manual Configuration section if you plan to test or use the web client(s).
If you want to better understand what the script configures on your behalf, continue reading this section. Otherwise, you can go directly to the following section, to learn how to convert and build the project.
Manual Configuration
Open thedeploy/server/directory.xml file with a text editor and change these settings, which are required to use the FWD ChUI Web Client:
- Search for
[spawner-path]and replace it with the full path to the spawn executable. On UNIX systems, we recommend to install this program in/opt/spawner/spawn(Linux) orc:\hotel\deploy\spawner\spawn.exe(Windows). - Search for
[client-start-dir]and replace it with the full path to thedeploy/clientfolder. Assuming your project is in~/hotelfolder on Linux and inc:\hotel\on Windows, it will look like:/home/<username>/hotel/deploy/client, where<username>is your Linux OS user namec:\hotel\deploy\deploy\client, if running on Windows
- Search for
[os-user]and replace it with your OS username (case sensitive). The prerequisite here is that[os-user]must have access to the[spawner-path]and the[client-start-dir].
Database Choice
By default, the Hotel sample project is configured to use the H2 database. H2 was chosen for the demo because it is implemented in Java and when used in embedded mode (as it is in this case), it requires virtually no deployment effort. Since there is no installation or configuration of an external database, this is the simplest way to go if you are trying to get the demo up and running quickly.
The project build also provides the option to use a PostgreSQL database as the back end. If this is your first look at FWD and you just want to get the sample application going, we recommend staying with the default of using H2 as the back end. However, if you already have gotten the sample application running and now you want to confirm that a PostgreSQL back end can be used, here is what you need to do:
- Install and configure the PostgreSQL database server, create a database cluster, and install the base support for PL/Java. This process is documented in Database Server Setup for PostgreSQL on Linux (note: these instructions are for Linux only at this time). Go only as far as restarting the database cluster. The sample application project build will do the rest.
- Enable PostgreSQL as a backing database in the project build. There are two ways to do this:
- modify
build.xmlto change thedb.postgresqlproperty fromfalsetotrue; or - do not modify
build.xml, but instead add the linedb.postgresql=truetobuild.properties(this will override the default setting for the same property inbuild.xml).
- modify
- Optionally, you can disable the H2 database in a similar manner:
- modify
build.xmlto change thedb.h2property fromtruetofalse; or - do not modify
build.xml, but instead add the linedb.h2=falsetobuild.properties.
- modify
If the PostgreSQL server was installed successfully and a FWD database cluster was created and configured properly, a PostgreSQL database for the sample application will be created and populated with data when you next deploy the project (see below).
Convert and Build Using FWD
At this point, all the configuration is done and it is time to convert and build the Hotel application. This must be done with the current directory set to ~/projects/hotel/ (Linux) or c:\projects\hotel\ (Windows).
ant deploy.all. This will:
- convert the application source code in the
abl/folder; - build the hotel application; and
- create and import an H2 database, in the
deploy/db/folder (and/or a PostgreSQL database in the FWD database cluster, if you followed the previous instructions to enable this).
Important: if you plan to run the Hotel GUI demo using either type of web client, run sudo install_spawner.sh (Linux) or install_spawner.cmd (Windows) to install the spawner after conversion completes. See here for an overview of what the spawner is and why it is needed. If you are on Linux, the current user must have sudo rights; on Windows, the current user should be an administrator. The spawner will be installed in the /opt/spawner/ folder on Linux and deploy\spawner on Windows.
There will be a cvt_${LOG_STAMP}.log and a build_${LOG_STAMP}.log file where you can see details of the conversion and build process. The ${LOG_STAMP} will be a timestamp in the yyyyMMdd_hhmmss format.
Run Reports
Reports can be run at any time, by using theant rpt task. This will execute the front end conversion phase (which consists of parsing, fixups and gap analysis) and after that generate schema and code reports; these will be found in:
rpt/code/code_profile.htmlfor the code resultsrpt/schema/schema_profile.htmlfor the schema results
There will be a rpt_schema_${LOG_STAMP}.log and a rpt_code_${LOG_STAMP}.log file where you can see details of the report generation process. Also, the cvt_f2_${LOG_STAMP}.log will show you the results of the front conversion phase. The ${LOG_STAMP} will be a timestamp in the yyyyMMdd_hhmmss format.
Since running reports performs the front end of conversion, it will overwrite any intermediate artifacts created by previous conversion or reporting runs, such as *.ast, *.jast, *.cache, *.parser, *.lexer, *.pphints, *.schema, *.dict, and *.p2o files in the data and abl subdirectories. This has no effect on the ability to run the sample application if the project was previously converted and built, and is noted here only for informational purposes.
Fonts Setup
If you are running on a Windows platform, then no font setup is needed since the system has all the fonts included by default.
If you are running on Linux or UNIX, these platforms do not have the Windows legacy fonts upon which so much of the ABL GUI layout and positioning is based. If you want the look of the application to match the Windows layout and positioning, then the following font files need to be added to deploy/server/fonts/:
courbd.ttf
cour.ttf
fsex301-l2.ttf
micross.ttf
segoeuib.ttf
segoeui.ttf
tahomabd.ttf
tahoma.ttf
The files can be found on the original Windows system on which the application was run. You must have a license to the fonts to allow them to be used in this manner, since you would be installing them on a system which did not otherwise have these fonts. To be clear, if you put these in place they will be used on every client that does not otherwise have these fonts locally installed at the operating system level. The font license would have to cover all of those use cases.
The directory is pre-configured to use these if the files are found (or if the client has them installed). If they are not found on the server or pre-installed on the client, then the FWD runtime code will pick its closest match and use that. Some screens will look different. The userid/password label text on the login screen is an example (it will be truncated if the fonts are not available).
Install the Root CA in Your Browser
The Hotel GUI application uses a self-signed root CA for the certificates which are used for https sessions or for SSL communication between the FWD Application Server and the FWD Clients. When accessing a FWD Web Client, unless the self-signed root CA is imported in your browser as a trusted root CA, you will be prompted by your browser to add an exception for the certificate. You can solve this by importing the hotel root CA into your browser. Also, note that this will work only if you access the FWD Web Client and the FWD Embedded App Demo via localhost - the SSL certificates have been created for localhost.
Depending on your browser, follow the steps below to install the root certificate. In all cases, the root CA is saved in the deploy/server/hotel-root.der file.
Installing the Root CA in Mozilla Firefox
For Firefox, follow these steps:- Open the
Preferencesmenu, look for theAdvancedsub-menu. - Select
Certificatesand click onView Certificates.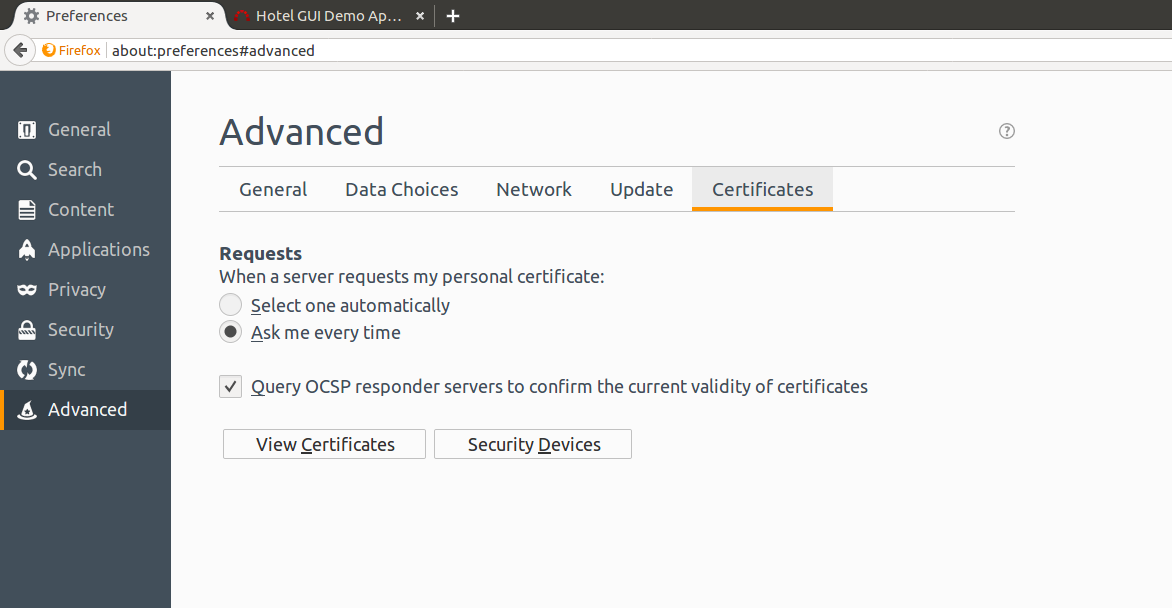
- Select
Authorities.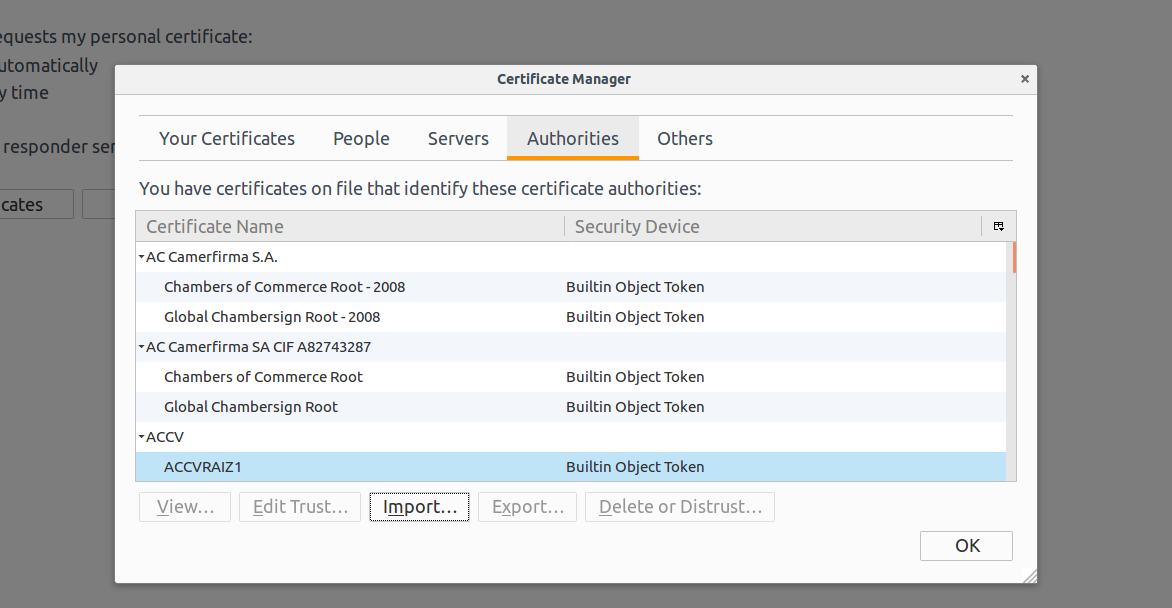
- Click the
Import...button. - Search for and select the
deploy/server/hotel-root.derfile. - Select the first option,
Trust this CA to identify websites..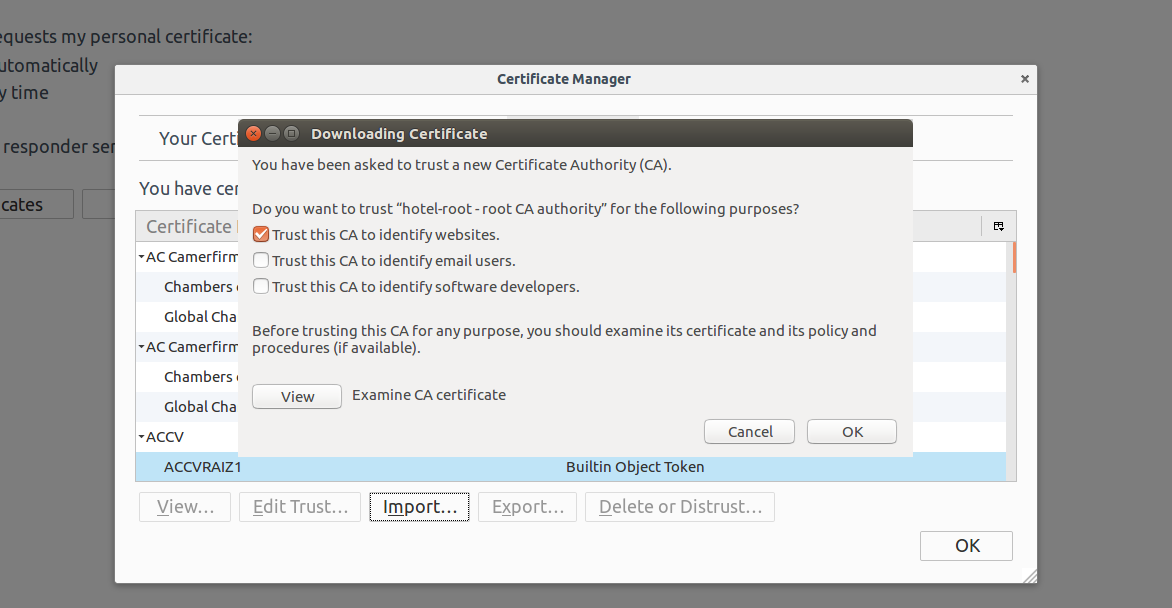
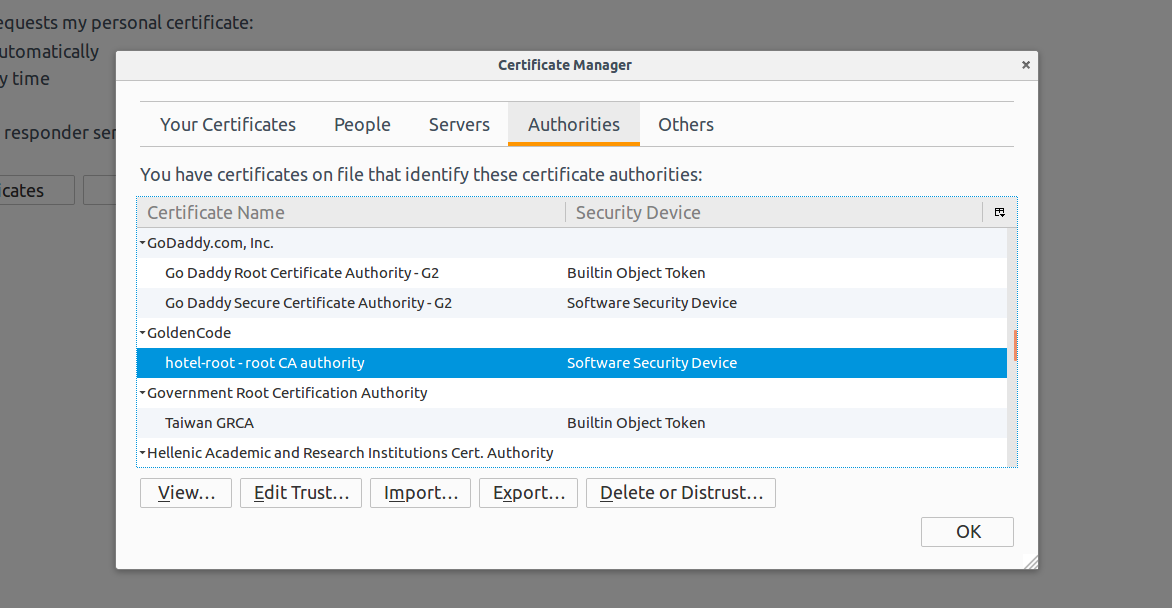
- Click OK and the root CA will be imported, and you will find it in this list.
Installing the Root CA in Google Chrome on Ubuntu
For Google Chrome on Ubuntu, follow these steps:- Open the
Settingsmenu, click onShow Advanced.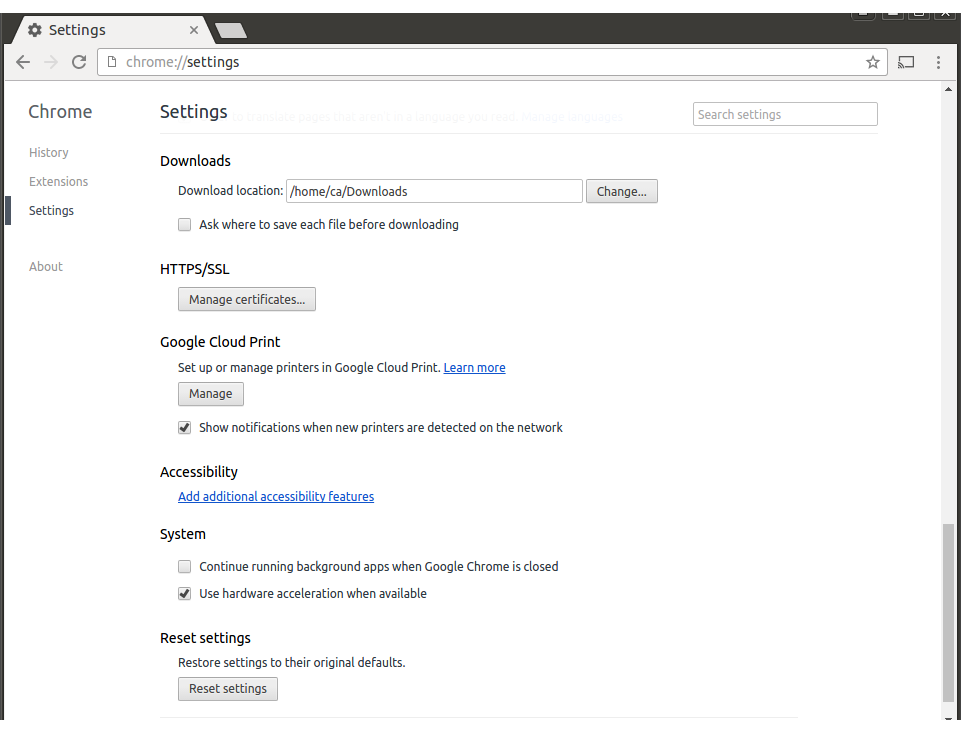
- Click on
Manage Certificates, then selectAuthorities.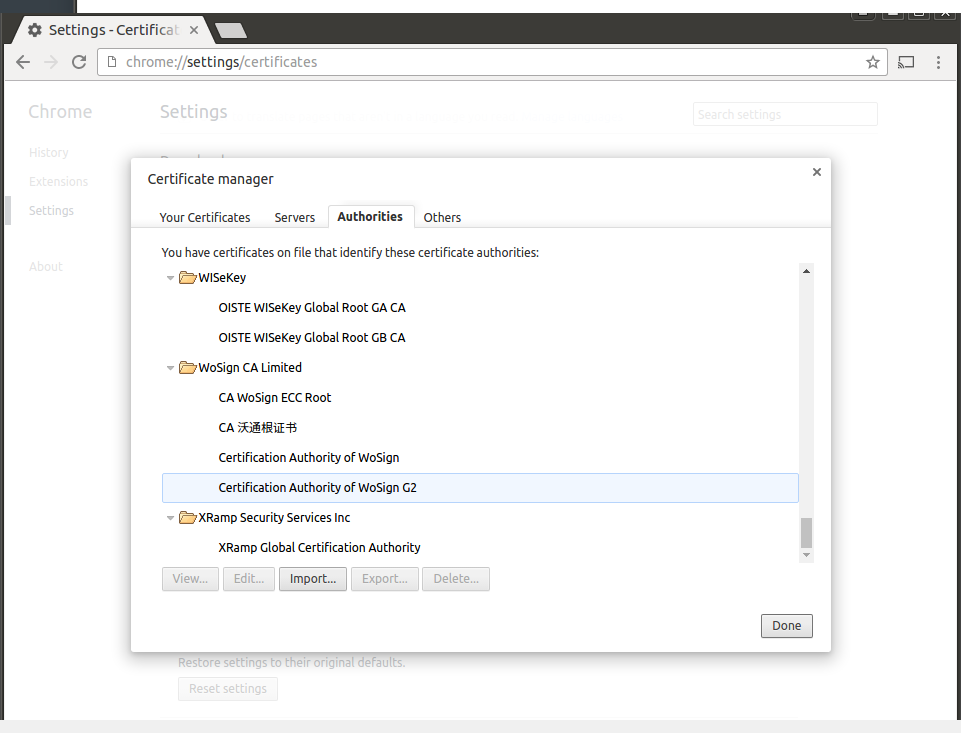
- Click on
Import..., traverse the folders to find thedeploy/server/hotel-root.derfile. If the selection dialog doesn't show it, select theDER-encoded binary, single certificatefrom the lower-right selection list. ClickOpenafter you've selected the.derfile. - Select the first option,
Trust this certificate for identifying websites..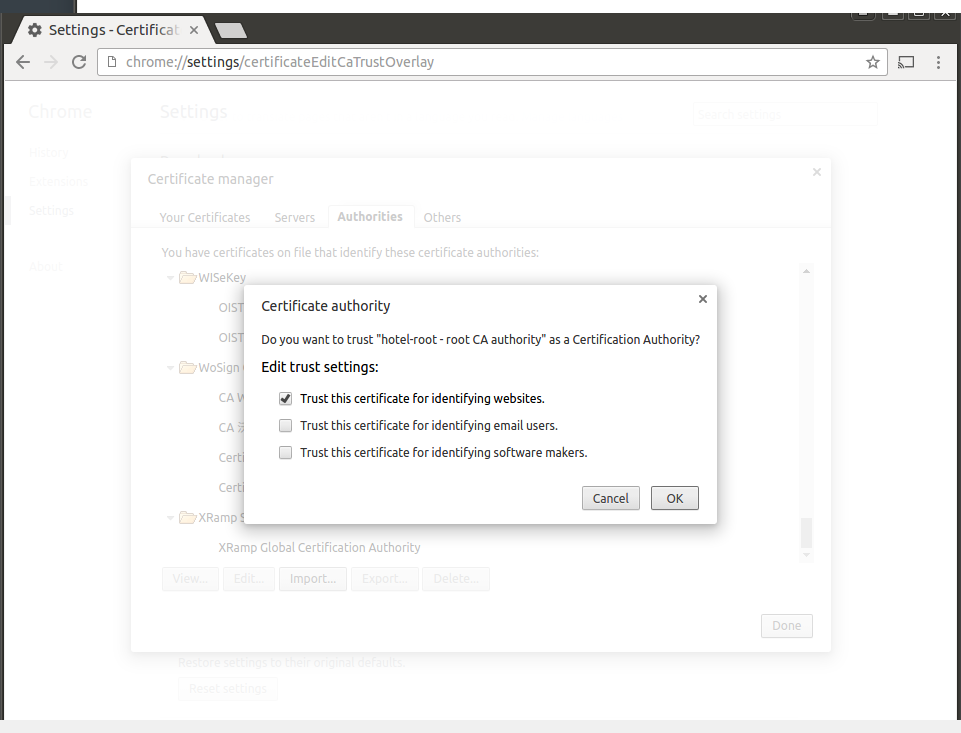
- Click OK and the root CA will be imported, and you will find it in this list.

Installing the Root CA in Google Chrome on Windows
- Like in Linux, open the
Settingsmenu, click onShow Advanced, then click onManage Certificates. - This
Certificatesdialog opens.
- Click on
Import.... The Certificate Import Wizard opens.
- Click
Next >.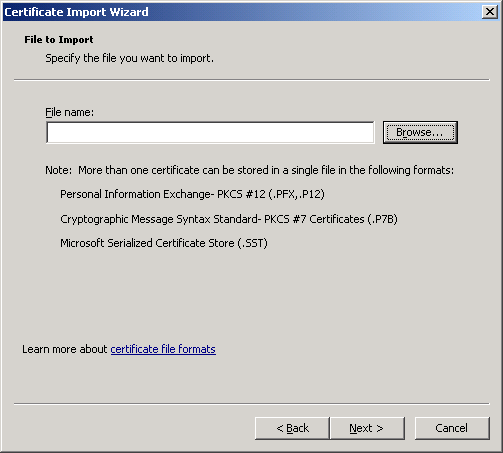
- Type in the path to the certificate (
c:\projects\hotel\deploy\server\hotel-root.der), or use theBrowsebutton to navigate and select the certificate. Then clickNext >.
- Select
Place all certificates in the following storeif not already selected.Trusted Root Certification Authoritiesshould be selected as in screen-shot. ClickNext >.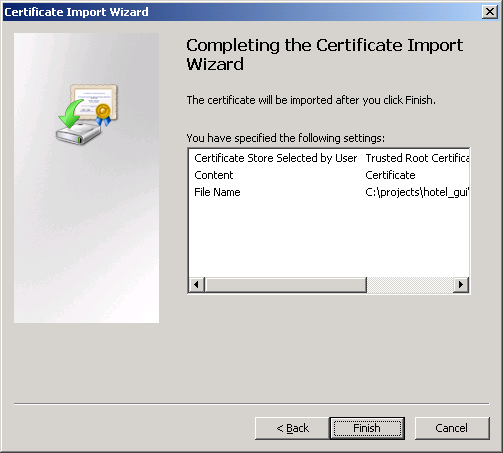
- Confirm the import by pressing
Finish. The certificate is imported and you can see it in the list.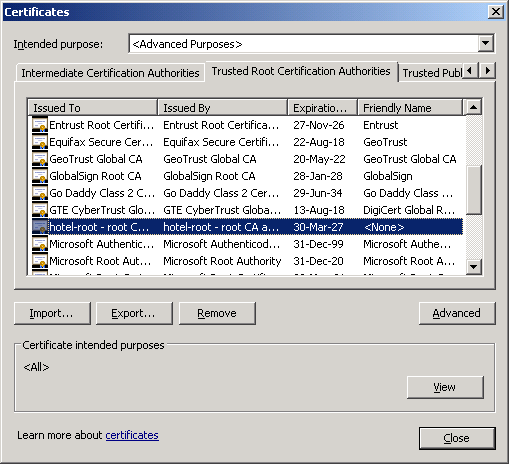
Install the Spawner
If you plan to run the Hotel GUI demo using either type of web client, run sudo install_spawner.sh (Linux) or install_spawner.cmd (Windows) to install the spawner. This must be done BEFORE you start the server.
See Spawner_Setup_and_Configuration for an overview of what the spawner is and why it is needed. If you are on Linux, the current user must have sudo rights; on Windows, the current user should be an administrator. The spawner will be installed in the /opt/spawner/ folder on Linux and deploy\spawner on Windows.
Start the FWD Server and Connect to the Application
The scripts required to run the Hotel application are found in the deploy/server and deploy/client folders.
To start the server, open a terminal (if on linux) or a command line (if on Windows) and go to the deploy/server folder. From here, start either the ./server.sh or server.cmd scripts. The server will be started when you can find a line like this, in the server's log file (deploy/server/server.log):
[01/19/2017 14:07:54 EET] (SessionManager.listen():INFO) {00000000:00000001:standard} Server ready
You can now connect a client to the server.
Swing GUI Client
This is the FWD client mode most closely analogous to the OpenEdge client, in that it runs as a stand-alone, desktop client application (though business logic still runs in the FWD application server). To launch this client type, switch to the deploy/client/ folder and execute ./client.sh on Linux or client.cmd if on Windows.
A login window should appear. Enter hotel as username and hotel as password to log into the application.
Any client log files and reports from the Hotel application will reside in the deploy/client/ folder.
Virtual Desktop Web Client
In this FWD client mode, the application's user interface appears essentially as the original, only it is presented within the client area of a web browser. This client area becomes the application's "virtual desktop".
Open the URL https://localhost:7443/gui in your browser (Chrome or Mozilla Firefox are recommended). See Browser Support for details on which browsers can be used by the FWD Web Client. The Hotel GUI is well tested in Chrome and Firefox. If you did not install the root certificate authority as described above, you will be warned that your connection may be insecure. Follow the instructions to accept a certificate exception, or better yet, go back and install the root CA and start over.
You will then be prompted to enter your operating system credentials for the machine on which the FWD spawner is installed. This login is required to allow the spawner to launch a FWD client delegate process, which is needed for the web client to run. After pressing Login, you might need to go through the certificate warning/exception process again if you did not install the root CA. Please note that due to the bug #3272 the password field must not be left empty.
When the user/password combination is submitted, a new instance of the spawner is launched in the background. Some antivirus solutions may interfere with normal behavior of the system, while checking the background process. It is possible to completely kill this auxiliary process or at least delay it by suspending it while scanning and/or showing a dialog for allowing you to create an exclusion rule. This will happen only once, and will only repeat if the spawner location is changed. If this happens, the link with FWD server may time out. After the timeout, simply refresh the web page in your browser and re-enter your credentials.
The Hotel application login window should appear. Enter hotel as username and hotel as password to log into the application. This login screen is different from the operating system (OS) login page above. Here the application user name and password are expected, while on the OS login page the operating system account credentials must be used.
Any client log files and reports from the Hotel application will reside in the deploy/client/ folder (Linux) or deploy\client\ (Windows).
The spawned FWD Client will remain running until you close the application ("Exit" button) or when the browser page is closed.
Embedded Web Client
The GUI applications can run in an embedded mode, where the legacy GUI screens are driven via a dedicated JavaScript driver, by an external web application. In the embedded/ folder, there is a demo application which embeds the Hotel GUI screens.
- go to the
embedded/folder and build the enclosing web application, usingant all; - go to the
embedded/runfolder and execute./embedded_server_cfg_launch.shon Linux orembedded_server_cfg_launch.cmdon Windows
After this, assuming your FWD server is still running, open the https://localhost:8443 link in your browser. See Browser Support for details on which browsers can be used by the FWD Web Client. The Hotel GUI embedded mode is well tested in Chrome and Firefox. There may be issues in other browsers since there is custom Javascript code which implements much of the embedded application.
See the note on anti-virus interference in the previous section. If the virtual desktop web client has not already been launched, you need to add the exclusion rule at this moment and then refresh the web page. Otherwise the anti-virus program will not notify you, since it is the very same spawner process launched in background.
If you did not install the root certificate authority as described above, you will be warned that your connection may be insecure. Follow the instructions to accept a certificate exception, or better yet, go back and install the root CA and start over. Next, you will be prompted with a login: the credentials are hotel as username and hotel as password - these will be sent to the FWD server and validated. If the credentials are valid, the Hotel application will show its screen chromeless (i.e., without any decorations or borders). Use the top-right-side tabs to change between screens.
The spawned FWD Client will remain running until you use the "Logout" menu item or when the browser page is closed.
Running the Hotel Application on an OpenEdge System
Using the Existing Scripts to Automate Distribution and Startup
If OpenEdge 10.2B is running on your Windows machine, you can have the Hotel GUI application ready and running just by executing thestart_hotel_abl.cmd script. Otherwise, you need to:
- execute
ant dist.ablto create a zip archive with all the needed files - copy the
hotel/distribution/hotel-abl-YYYYMMDD.zip, whereYYYYMMDDis the current timestamp, to a Windows machine with OpenEdge 10.2B, in ad:\hotelfolder - extract the archive using Windows Explorer, while in the
hotelfolder - run the
start_hotel_abl.cmdscript
If you want to know more details about what the script does and how to manually import the database, see the next section.
Details on How to Import the Database and Run the Hotel Application Manually
The Hotel project is a GUI application built on OpenEdge 10.2B. To run the application on your legacy system, you need these files:abldb/folder contains an already-imported Hotel database, in ABL format.data/hotel.dfis the database schema.data/dump/hotel/folder contains the.dexport files with the table records for the Hotel database.abl/folder contains the ABL sources and all project images.hotel.iniandhotel.pfare configurations files.hotel.batis a script which starts the Hotel application; use this script if you already have a DB server started for theabldb/hotel.dbdatabase.- the
start_hotel_abl.cmdis a script which automates the DB server startup/shutdown and to start the application.
- run the
ant dist.ablto create a zip archive; this archive will contain all the files listed above. The archive will be found inhotel/distribution/hotel-abl-YYYYMMDD.zip, whereYYYYMMDDis the current timestamp. Copy this file to a machine with OpenEdge environment in ad:\hotelfolder and extract it. - copy the files and folders listed above manually on a machine with OpenEdge environment, in a
d:\hotelfolder
- delete all the files in the
d:\hotel\abldbfolder - while in the
d:\hotelfolder, run the OpenEdge Procedure Editor and openTools/Data Dictionary. - create a database with the
abldb\hotel.dbphysical name and the logical namehotel. - open
Admin/Load Data and Definitions/Data Definitions (.df file)and import thedata\hotel.dfschema - open
Admin/Load Data and Definitions/Table Contents (.d file)and:- select all the hotel-related tables
- press
Show Hiddenand select the_Usertable, too - set as
Input Directorythedata/dump/hotel/folder
- once the import is complete, exit the
Procedure Editor
start_hotel_abl.cmd script are:
prostrct repair abldb/hotel abldb/hotel.st- required if you didn't create the Hotel database manually and used the existing one in theabldb/folderproserve abldb/hotel.dbto start a database serverprowin32.exe -ininame hotel.ini -pf hotel.pfto execute the application- shutdown the database server via
proshut -by abldb/hotel.db
Use the Hotel Project as a Template for a Different Application
This section will explain how to use the existing Hotel application to configure a new application for conversion, database import and runtime setup. You will find details on how to use the existing scripts to automate this process or how to make these changes manually, if you wish so.
Please note that this just covers the most common tasks. While it will be suitable for getting started or for a POC, it is likely that a large application would require some of the other options and advanced techniques documented elsewhere. Please see the Conversion Handbook for full details.
Configure your Project Using the prepare_template Script
First step in getting your application converted is to prepare the template. This section will explain how to do this using the existing scripts; for a more details description of the required configuration (or if you want to do this manually), see the FWD project configuration requirements section.
prepare_template.sh script or prepare_template.cmd script and execute it. This will ask you for the following input:
Enter your application name (only letters or digits, first character a letter):
This is the name of your application, how will be known by FWD; it must include only letter or digits, with the first character being a letter, all lowercase. If your application name isMy App, entermyapp.Edit the regex which matches all your include files (enter for default):
FWD needs to know a regular expression which matches all your include files; this can be of the*.[fhi]format. If you are running the conversion on an operating system where file names are case-sensitive, make sure to match upper case extensions, too, with a regex like*.[fFhHiI]. The default value for this entry will be*.[fhi].Edit the regex which matches all your program files (enter for default):
Same with include files, FWD needs to know a regular expression which matches all your program files. The default value for this entry will be*.[pPwW]. If you want to specify an explicit file list to be converted, create a file namedfile-cvt-list.txtand place there the relative names (to theabl/folder) of all the programs you wish to convert. The build script will know to pickup this file, and bypass the pattern.Edit the root package name - Java format (enter for default):
All your converted Java sources need to be placed in a root package - this must follow the Java format for package names; the default value will betest.<appname>, where<appname>will be the value you entered in the first step. If you want to change it, you can use something likecom.mycompany.myapp.Enter the PROPATH from your progress.ini file (enter for default):
At this step, FWD needs to know the PROPATH you are using, from yourprogress.inifile; by default, this will be set to.;.Enter the legacy database name:
Here, you must enter the legacy database name. If your application uses multiple databases, enter the name of your default database. These scripts allow only one database to be specified. See the next section on how to configure more than one database.Enter the SQL admin for your imported database:
Provide the name of the SQL admin for your database.Enter the SQL admin password for your imported database:
Provide the password associated with your SQL admin, for your database.Enter the SQL user for your imported database:
You must provide a SQL user for your imported H2 database - this will automatically be created by FWD.Enter the SQL user password for your imported database:
You must provide a password for the SQL user specified above.Enter the date format from your progress.ini (enter for default):
Enter the date format used by your OpenEdge installation; by default, this will bemdy, but can bedmyor any other version.Enter the number group separator from your progress.ini (enter for default):
Enter the number group separator used by your OpenEdge installation; by default, this will be,.Enter the number decimal separator from your progress.ini (enter for default):
Enter the decimal separator used by your OpenEdge installation; by default, this will be..Enter the full class name associated with the entry point for your application:
Enter the name of the program used to start the legacy OpenEdge application. This name must be a converted Java class name. If you don't know it know, enter something likecom.mycompany.myapp.TODOand you can edit it later. Otherwise, if your name is (for example)start.p, entercom.mycompany.myapp.Start- the requirement is to use the full Java class name.
After this (or after checking the reports), open the cfg/p2j.cfg.xml and check the metadata node: here, provide a list of all your meta-table names used by your application.
Setup of Additional Databases
If your project requires only one database, skip this section. Otherwise, use the following details to add additional databases to the project.
In FWD, databases need to be configured for conversion, import and runtime. Once the project has been prepared, you can edit files manually to add one or more additional databases.
Configuring an Additional Database for Conversion
For configuration purposes, all databases need to be specified in the cfg/p2j.cfg.xml file. After you have initially configured your project, the database specified there will be defined in a namespace child node of the schema node; its format is like this:
      <namespace
         name="[dbname]"
         importFile="data/[dbname].df"
         xmlFile="data/namespace/[dbname].dict"
         default="true" >
         <parameter name="ddl-dialects" value="h2,postgresql" />
         <dialect-specific name="h2">
            <parameter name="collation" value="en_US_P2J" />
         </dialect-specific>
      </namespace>
Add a
namespace node to the schema node for each of your additional database, replacing the [dbname] text with your database name.
Configuring an Additional Database for Import
The database creation, import and re-indexing is driven via ANT, with the details specified in thebuild.xml file. Open this file and edit the following targets:
- the
create.db.h2target has a java task like this:<java classname="org.h2.tools.RunScript" fork="true" failonerror="true" dir="${basedir}" > <jvmarg value="-Xmx1024M"/> <arg value ="-url"/> <arg value ="${sql.url}"/> <arg value ="-user"/> <arg value="${sql.user}"/> <arg value ="-password"/> <arg value="${sql.pass}"/> <arg value ="-script"/> <arg value = "ddl/schema_table_${db.name}_h2.sql"/> <arg value ="-continueOnError"/> <classpath refid="app.classpath"/> </java> - the
import.db.h2target has a java task like this:<!-- fill the H2 database --> <java classname="com.goldencode.p2j.pattern.PatternEngine" fork="true" failonerror="true" dir="${basedir}" > <jvmarg value="-Xmx1024M"/> <arg value ="-d"/> <arg value ="2"/> <arg value ="dbName=${escaped.quotes}${db.name}${escaped.quotes}"/> <arg value ="targetdb=${escaped.quotes}h2${escaped.quotes}"/> <arg value ="url=${escaped.quotes}${sql.url}${escaped.quotes}"/> <arg value ="uid=${escaped.quotes}${sql.user}${escaped.quotes}"/> <arg value ="pw=${escaped.quotes}${sql.pass}${escaped.quotes}"/> <arg value ="maxThreads=4"/> <arg value ="schema/import"/> <arg value ="data/namespace/"/> <arg value ="${db.name}.p2o"/> <classpath refid="app.classpath"/> </java>
java ant task (based on the respective template above) for each of your additional databases, and replace:
- the
${db.name}text with your database name, in the<arg value ="dbName=${escaped.quotes}${db.name}${escaped.quotes}"/>and<arg value ="${db.name}.p2o"/>arguments. - the
{sql.url}withjdbc:h2:${deploy.home}/db/${db.name};MVCC=true;MV_STORE=FALSE, replacing${db.name}text with your database name - you can either leave the database credentials to be the same for all databases or change the
${sql.user}and${sql.pass}texts with unique username and password for each database, as you wish.
[TODO: add instructions for PostgreSQL]
Configuring an Additional Database for Runtime
At runtime, FWD needs to know the details of all your application's databases. The databases are configured in the FWD directory, the deploy/server/directory.xml file, in the database node. Open this file and search for the "database" text - you will see a node with the settings for the database you specified in initial configuration. The node will look like this:
          <node class="container" name="[dbname]">
            <node class="container" name="p2j">
              <node class="string" name="schema">
                <node-attribute name="value" value="[dbname]"/>
              </node>
              <node class="boolean" name="load_at_startup">
                <node-attribute name="value" value="TRUE"/>
              </node>
              <node class="string" name="embedded-collation">
                <node-attribute name="value" value="en_US_P2J"/>
              </node>
            </node>
            <node class="container" name="hibernate">
              <node class="string" name="dialect">
                <node-attribute name="value" value="com.goldencode.p2j.persist.dialect.P2JH2Dialect"/>
              </node>
              <node class="container" name="connection">
                <node class="string" name="driver_class">
                  <node-attribute name="value" value="org.h2.Driver"/>
                </node>
                <node class="string" name="url">
                  <node-attribute name="value" value="jdbc:h2:../db/[dbname];DB_CLOSE_DELAY=-1;MVCC=true;MV_STORE=FALSE"/>
                </node>
                <node class="string" name="username">
                  <node-attribute name="value" value="[dbuser]"/>
                </node>
                <node class="string" name="password">
                  <node-attribute name="value" value="[dbpass]"/>
                </node>
                <node class="integer" name="prepareThreshold">
                  <node-attribute name="value" value="1"/>
                </node>
              </node>
              <node class="boolean" name="show_sql">
                <node-attribute name="value" value="FALSE"/>
              </node>
              <node class="container" name="c3p0">
                <node class="integer" name="max_size">
                  <node-attribute name="value" value="10"/>
                </node>
                <node class="integer" name="min_size">
                  <node-attribute name="value" value="2"/>
                </node>
                <node class="integer" name="timeout">
                  <node-attribute name="value" value="120"/>
                </node>
                <node class="integer" name="idle_test_period">
                  <node-attribute name="value" value="60"/>
                </node>
                <node class="integer" name="acquire_increment">
                  <node-attribute name="value" value="2"/>
                </node>
                <node class="boolean" name="validate">
                  <node-attribute name="value" value="FALSE"/>
                </node>
              </node>
              <node class="container" name="cache">
                <node class="boolean" name="use_second_level_cache">
                  <node-attribute name="value" value="FALSE"/>
                </node>
                <node class="boolean" name="use_query_cache">
                  <node-attribute name="value" value="FALSE"/>
                </node>
                <node class="container" name="region">
                  <node class="string" name="factory_class">
                    <node-attribute name="value" value="org.hibernate.cache.ehcache.EhCacheRegionFactory"/>
                  </node>
                </node>
              </node>
              <node class="container" name="jdbc">
                <node class="integer" name="fetch_size">
                  <node-attribute name="value" value="1024"/>
                </node>
              </node>
            </node>
          </node>
Use the template above, replacing all the
[dbname], [dbuser] and [dbpass] texts with the appropriate values, as you specified them in the build.xml file, in the previous section. Add an entry under the database node for each of your additional database.
[TODO: add instructions for PostgreSQL].
Prepare Your Application Sources, Schema and Database Export
After the project configuration using theprepare_template scripts, the project is ready to have your application files copied to:
- place the legacy sources of your Openedge ABL application in the
abl/folder. This must include all your sources, uncompiled: programs (all.pand.wfiles, and any other files which act as OpenEdge programs) and all the include files, while preserving the folder structure. - for each database, export your database schema and copy the generated
.dffile in thedata/folder. There, you can find the thestandard.dfschema, associated with the OpenEdge meta tables. The name of the schema file for your database(s) need to have the<dbname>.dfformat; if a DB name ismyapp, then its file is namedmyapp.df. - for each database, create a dump of your table records and place all the
.dfiles in thedata/dump/<dbname>folder; also, export the_Usermeta table for your database and place the_User.dfile in the same folder.
Run Reports
Before generating the reports, you will need to have an already built copy of the FWD project (or a symbolic link to the installation location), named p2j/, inside this project folder. Once you have this, use ant rpt (and ant clean.rpt to clean previous outputs) to generate the reports. For the reports to provide an accurate description of your application, all your sources will be parsed and prepared (the "front conversion phase", in FWD, will be executed) - this might take a while, so be patient. To see the progress, look into the cvt_f2_${LOG_STAMP}.log file - here, you will find also any errors FWD encountered during the parsing and prepare phase.
rpt/code/code_profile.html- the reports for your entire code set, which includes statement, built-in methods, functions, type usage, variables and many-many more - you will have a deep insight on what OpenEdges feature are in use by your application and the level of support in FWD.rpt/schema/schema_profile.html- it contains details about your physical database schema, static temporary tables or work files in use by your application
If the front phase passes successfully, you can run a full conversion - see next section for details.
Run Conversion
At this point, all the configuration is done and is time to convert your application. Before conversion, you will need to have a built copy of the FWD project (or a symbolic link), named p2j/, inside this project folder.
If you are using a file-cvt-list.txt file to specify which programs to create, execute ant convert.list; otherwise, execute ant convert. This will start the conversion process of all your entire application, from start to finish. The output is logged in a cvt_${LOG_STAMP}.log file. If all goes well, the entire specified code set will be converted and, depending on its size, may take from minutes to hours.
In the conversion log, you can find the list of all files picked up and converted by FWD; the conversion will not stop if there are failures in the front phase, but it will stop if there are issues in the middle/back phases. The front phase is the most important: you can see if this has finished after all these lines are output in the log (the Elapsed job time will vary depending on your application size):
     [java] ------------------------------------------------------------------------------
     [java] P2J Conversion Driver
     [java] ------------------------------------------------------------------------------
...
     [java] ------------------------------------------------------------------------------
     [java] SchemaLoader
     [java] ------------------------------------------------------------------------------
...
     [java] ------------------------------------------------------------------------------
     [java] Scanning Progress Source (preprocessor, lexer, parser, persist ASTs)
     [java] ------------------------------------------------------------------------------
...
     [java] ------------------------------------------------------------------------------
     [java] Elapsed job time:  00:00:01
...
     [java] ------------------------------------------------------------------------------
     [java] Post-Parse Fixups
     [java] ------------------------------------------------------------------------------
...
     [java] ------------------------------------------------------------------------------
     [java] Gap Analysis Marking
     [java] ------------------------------------------------------------------------------
...
     [java] ------------------------------------------------------------------------------
     [java] Schema Fixups (data dictionary)
     [java] ------------------------------------------------------------------------------
...
     [java] ------------------------------------------------------------------------------
     [java] Schema Fixups (Progress source file schemas)
     [java] ------------------------------------------------------------------------------
...
     [java] ------------------------------------------------------------------------------
     [java] Elapsed job time:  00:00:04
Capture Legacy Text Metrics
After converting the application, FWD requires knowledge about the metrics of the various texts used by your legacy application: this is a prerequisite so that the frame layout (when implicit dimension or location are used for widgets) can be computed correctly.
The tool used to capture the metrics is thetools/get-text-metrisc.p ABL program, from the FWD project: this needs to be run on a Windows OS machine, where also OpenEdge is installed. It will require as input two files:
- the list of texts, as collected during the conversion, in the
ui_strings.txtfile - a
font-list.txtfile with the fonts for which metrics will be captured. The structure of this file will be one font per line, with this syntax:font-name,<font-size>,<bold>,<italic>,<underline>
where: font-nameis the font name, as inTahomaorMS Sans Serif<font-size>is the font size, in points<bold>- if this is a bold font, set totrue, otherwisefalse<italic>- if this is an italic font, set totrue, otherwisefalse<underline>- if this is an underline font, set totrue, otherwisefalse
For example, if you have in your font-table a font defined as MS Sans Serif, size=8, the entry in the font-list.txt file will be:
MS Sans Serif,8,false,false,false
If you want to capture metrics for all combinations of bold, italic, underline and for all font sizes, enter only the font name, per line, as in:
MS Sans Serif
Each font definition must appear only once in this file.
Once you have thefont-list.txt and ui_strings.txt files, copy these and the get-text-metrics.p in the same folder. Run the tool from the command line using prowin32.exe -p get-text-metrics.p. The tool will ask you for three inputs:
Enter the maximum font size (<= 1638):- this is the maximum font size for which metrics will be captured. If you do not specify an exact font size (i.e. use only font-name infont-list.txt), then metrics will be captured for all font sizes from 1 to the value you enter here (20 is the default), and all bold, italic, underline combinations.Enter the file name with the font list:- the default name isfont-list.txt, you can adjust it or accept this valueEnter the file name with the text list:- change this toui_strings.txt
Depending on the number of lines in ui_strings.txt, this tool might take a few minutes to complete. The metrics will be saved in the text-metrics.xml. Once you have this file, copy it to the src/ folder of your conversion project.
Capture Legacy Font Metrics
To be able to compute the correct frame layout, FWD requires knowledge about the metrics for the fonts used by your application. FWD has built-in metrics for these fonts, for size 1 to 100 and all bold, italic and underline combinations:Courier NewMicrosoft Sans SerifMS Sans SerifFixedsysSegoe UITahoma
If your application's font-table from progress.ini uses fonts other the ones specified above, you need to capture the legacy metrics of these fonts. Similar to capturing text metrics, FWD provides the tools/get-font-metrics.p tool to automate this. You will need to build a font-list.txt file with fonts specified in the same way as for the text metrics (or you can reuse the one built for the text metrics).
Copy the font-list.txt file and the tools/get-font-metrics.p file to a machine with Windows OS and installed OpenEdge, and run it using the prowin32.exe -p get-font-metrics.p command. The metrics will be captured in the font-metrics.xml file; copy this file as the src/font-metric-ext.xml file (add the -ext suffix to its name), in your conversion project.
Build Your Application
Once you have a successful conversion, you can compile and build the application using FWD: use ant jar to generate the application jar file and ant deploy.prepare to prepare the project for database import and running the FWD server. There will be a build_${LOG_STAMP}.log file where you can see details of the build process.
Import the Database
If you have more than one database, make sure all database are configured in build.xml as specified in the Setup of additional databases section.
Importing the database(s) is as easy as running ant import.db (use ant clean.db to delete any previous imported database) - this will create, import and index your database. The ANT script is currently configured only for the H2 database, which runs in embedded mode, so you will not need to install any DB server. If your database is large, make sure to have enough disk space for the import.
Once this is finished, the database will be created in the deploy/db folder.
The DDL generated for your database (for all specified dialects) can be found in the ddl/ folder.
Setup the Font Table
The GUI clients use OS fonts to draw the text. If your font table inprogress.ini differs from the implicit table (or you are using fonts other than the ones in the standard font table) you need to specify them in directory.xml. Search for the font-table text:
- enter the
default-font, in thenode-attributechild. If you are not specifying any default font inprogress.ini, then leave thevalueattribute empty, as invalue="". Here, the default-font is set toMS Sans Serif, size=8.<node class="string" name="default-font"> <node-attribute name="value" value="MS Sans Serif, size=8"/> </node> - enter the
default-fixed-font, in thenode-attributechild. If you are not specifying any default fixed font inprogress.ini, then leave thevalueattribute empty, as invalue="". Here, the default-fixed-font is set toCourier New, size=8.<node class="string" name="default-fixed-font"> <node-attribute name="value" value="Courier New, size=8"/> </node> - edit each of the
font#section (where#is a numeric index), and specify the font from yourprogress.ini, in thevalueattribute for thenode-attributechild node; make sure that the index you specify in thefont#name matches the index of the font in the legacy font table:<node class="string" name="font0"> <node-attribute name="value" value="FixedSys"/> </node>
Once the font-table is setup, and if you want to run FWD on operating systems where these fonts are not pre-installed, edit the custom-fonts section to specify the font definition for each font family used in the font-table. Only TrueType fonts are supported by FWD at this moment. For example, to specify a Montserrat Bold font, use:
          <node class="container" name="font2">
            <node class="string" name="font">
              <node-attribute name="value" value="Montserrat"/>
            </node>
            <node class="boolean" name="bold">
              <node-attribute name="value" value="TRUE"/>
            </node>
            <node class="string" name="file">
              <node-attribute name="value" value="fonts/Montserrat-Bold.ttf"/>
            </node>
          </node>
The
file node specifies a path relative to the location where the FWD server is started, i.e. deploy/server/. In this case, place your font definition files in the deploy/server/fonts folder.
Make sure that all child nodes under the custom-fonts node have an unique name, with a font prefix and a numeric index suffix.
The custom-fonts node in the directory.xml of your project is configured to define some of the common Microsoft fonts. Adjust the font-table so that each of the file nodes points to the correct font definition or make sure that these fonts are installed on your system. We are working on finding freely licensed fonts that are good replacements for these fonts (you can watch the progress of this task in #2765).
Setup the Color Table
The standard color table is already defined in the FWD runtime. If you use a non-standard color table or you are using colors other than the 16 colors defined in the standard color table, you need to add them to directory.xml. Open this file and search for the color-table - you will see this content:
          <node class="string" name="color16">
            <node-attribute name="value" value="255,255,255"/>
          </node>
          <node class="string" name="color17">
            <node-attribute name="value" value="255,255,255"/>
          </node>
          <node class="string" name="color18">
            <node-attribute name="value" value="255,255,255"/>
          </node>
Similar to the font-table, add
color# nodes (where # is the color index in the color table) for each of your additional color. The color is specified in RGB format, the same way as it was specified in your progress.ini file.
Run the FWD Server and Connect to Your Application
Before running the FWD server, make sure FWD knows the correct entry point into your application. Open the name_map.xml file with a text editor and look for the full name of your OpenEdge program which acts as an entry point in your application; if your program is named start-my-app.p and resides in abl/my/app/ folder, look for my/app/start-my-app.p name. You will find a line like this:
<class-mapping jname="my.app.StartMyApp" pname="my/app/start-my-app.p"/>Now, open the
deploy/server/directory.xml file with a text editor, search for p2j-entry text and you will find a XML node like this:
            <node class="string" name="p2j-entry">
              <node-attribute name="value" value="com.mycompany.myapp.TODO.execute"/>
            </node>
Now, make sure the
com.mycompany.myapp.TODO.execute text is set to com.mycompany.myapp.my.app.StartMyApp.execute:
com.mycompany.myappis what you specified at theEnter the root package name - Java format (enter for default)question during configurationmy.app.StartMyAppis the value of thejnamenode you found inname_map.xml.
The server startup scripts are found in the deploy/server folder. To run the FWD server, change your directory to deploy/server and execute the server.sh or server.cmd script, depending on your OS. The FWD server's log will be captured in the server.log and stdout.log files.
To terminate the FWD server, use the -k option, as in ./server.sh -k.
Starting the FWD client is the same as described in the section for the Hotel application: go to the deploy/client folder and execute the client.cmd or client.sh script.
FWD Project Configuration Details
This section describes the files changed by theprepare_template script and the meaning of these changes. First step is to make a copy of the following files and place them in the specified folder, overwriting any existing version:
- copy
build.properties.templatetobuild.properties - copy
deploy/server/directory.xml.templatetodeploy/server/directory.xml - copy
cfg/p2j.cfg.xml.templatetocfg/p2j.cfg.xml
If you want to use an explicit file list, to convert only a portion of your application, create a file-cvt-list.txt file and place it in the root of the project folder. Each line in the file must be a program file name relative to the abl/ folder.
- related to converting your application:
[appname]- the application name, only letters or digits, lowercase, first character a letter. If your application name isMy App, usemyapp.[include-spec]- a regular expression to match all your include files. Use*.[fhi]for example; if your application was run on Windows OS, and conversion is done under a Linux OS, use the*.[fFhHiI]expression, to match the uppercase extension, too.[program-spec]- a regular expression to match all your program files. Use*.[pPwW]for example.[pkgroot]- the package root where converted sources will be placed, in Java format. Use something likecom.mycompany.myapp.[pkgrootfolder]- the same semantic as the[pkgroot], except that the dots are replaced with a/character[propath]- the PROPATH as it appears in yourprogress.inifile.
- incfg/p2j.cfg.xml- prefix all your propath entries with the${P2J_HOME}/abltext and use unix-style file and path separators (/and:); if your propath is something likefoo:bar, inp2j.cfg.xmlthe propath must be${P2J_HOME}:${P2J_HOME}/abl/foo:${P2J_HOME}/abl/bar@ (note the first entry is${P2J_HOME})
- indeploy/server/directory.xml, use the exact PROPATH as in yourprogress.inifile.[search-path]- is the same value as your original PROPATH (fromprogress.ini), but using the file and path separators specific to the OS where you are running the FWD server.[opsys]- the value of the{&OPSYS}preprocessor constant, from your OpenEdge installation where the application was ran. This can be for exampleUNIXorWIN32.[winsys]- if your application was using a window system, change it to<parameter name="winsys" value="[MS-WINDOWS]" />. Otherwise, delete this entry.[path-separator]- enter the path separator for the OS where your OpenEdge application used to run::for Linux-based OS or;for Windows OS.[file-separator]- enter the file separator for the OS where your OpenEdge application used to run:/for Linux-based OS or\for Windows OS.[case-sensitive]- if the OS where your OpenEdge application used to run is case-insensitive (like Windows OS), useTRUE; otherwise, useFALSE.[unix-escapes]- if the OS where your OpenEdge application used to run is Linux-based, useTRUE; otherwise,FALSE.[dateFormat]- enter the date format used by your OpenEdge installation; can bemdyordmyor any other version.[numberGroupSep]- enter the number group separator used by your OpenEdge installation.[numberDecimalSep]- enter the number decimal separator used by your OpenEdge installation.
- related to database import:
[dbname]- the name of your legacy OpenEdge database[dbuser]- provide a SQL user for your imported database; in case of H2, this will automatically be created by FWD. In case of PostgreSQL, it needs to be an existing user.[dbuserpass]- provide a password for the SQL user specified above.[dbadmin]- provide a DB admin name for your imported database, used only for PostgreSQL backend.[dbadminpass]- provide a DB admin password for the user specified above.[dmoindex]- provide the location of the DMO index: these will be the[pkgrootfolder]/dmo/dmo_index.xml, where[pkgrootfolder]is replaced with the value you determined above.
- related to runtime:
[spawner-path]- the full path to the spawner installation folder (like/opt/spawner/spawn)[client-start-dir]- the full path to thedeploy/clientfolder[p2j-entry]- the converted, full class name, of the program used as an entry point into your application.[os-user]- the name of the OS user used to connect via the Web client.
- in
build.properties:[appname][program-spec][dbname][dbuser][dbuserpass][dbadmin][dbadminpass][pkgrootfolder]
- in
deploy/server/directory.xml:[spawner-path][client-start-dir][dmoindex][dbname][dateFormat][numberGroupSep][numberDecimalSep][p2j-entry][pkgroot]- use the PROPATH as specified inprogress.ini[propath][search-path][path-separator][file-separator][case-sensitive][dbuser][dbuserpass][os-user]
- in
cfg/p2j.cfg.xml:[propath][include-spec][pkgroot]- use the "prepared" PROPATH, for conversion[dbname][path-separator][file-separator][case-sensitive][unix-escapes]
ABL Features in Use
This is an ADM/ADM2 GUI application which uses quite a wide range of ABL features. This is just a high level summary. For the full details, please see the reports that can be downloaded above.
Don't assume that FWD does not support an ABL feature just because it isn't listed here. This is just the list of what we used in this "simple" application. For a better understanding of what FWD supports, please see Supported ABL Features.
TBD
© 2004-2017 Golden Code Development Corporation. ALL RIGHTS RESERVED.